DERManager App
The DERManager app refers to the iPhone app that helps you to work with the HEINE DERManager on your iPhone. You can:
- Create patients
- Capture images
- Place images on the body map
- And much more
Click here to download.
Skin Imaging
What is the difference between image groups, overview images and detail images?
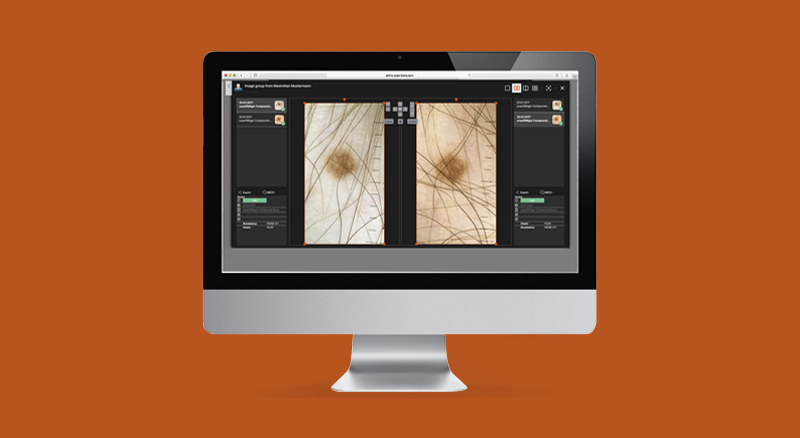
Image group
Single shots or repeated shots of dermoscopic images of one mole, including positioning on the bodymap.
Overview image
Workflow support for detail image with an overview image of a body region from a patient.
Detail image
A detail image is a dermoscopic image of a mole, which is connected to a specific survey image.
Was this article helpful for you?
How can I create a new Image group?
- Connect your smartphone to a dermatoscope.
- Open the DERManager app
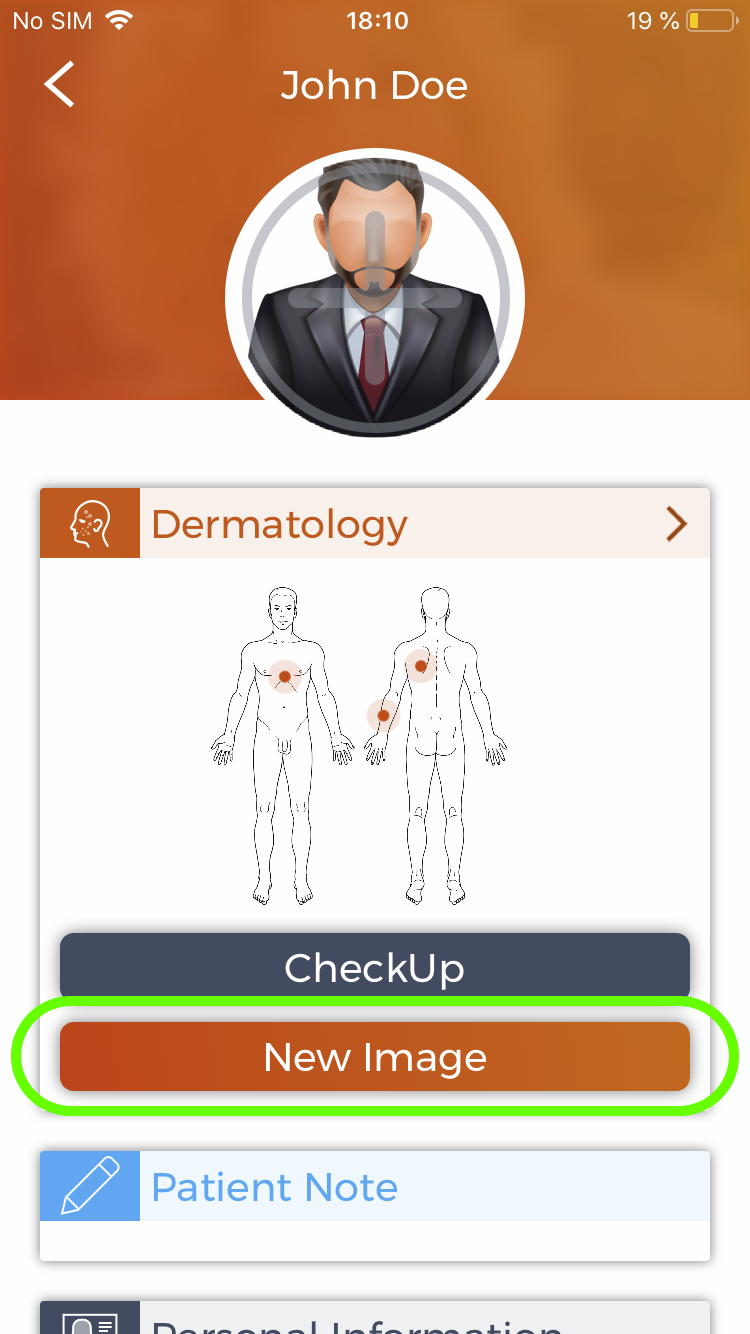
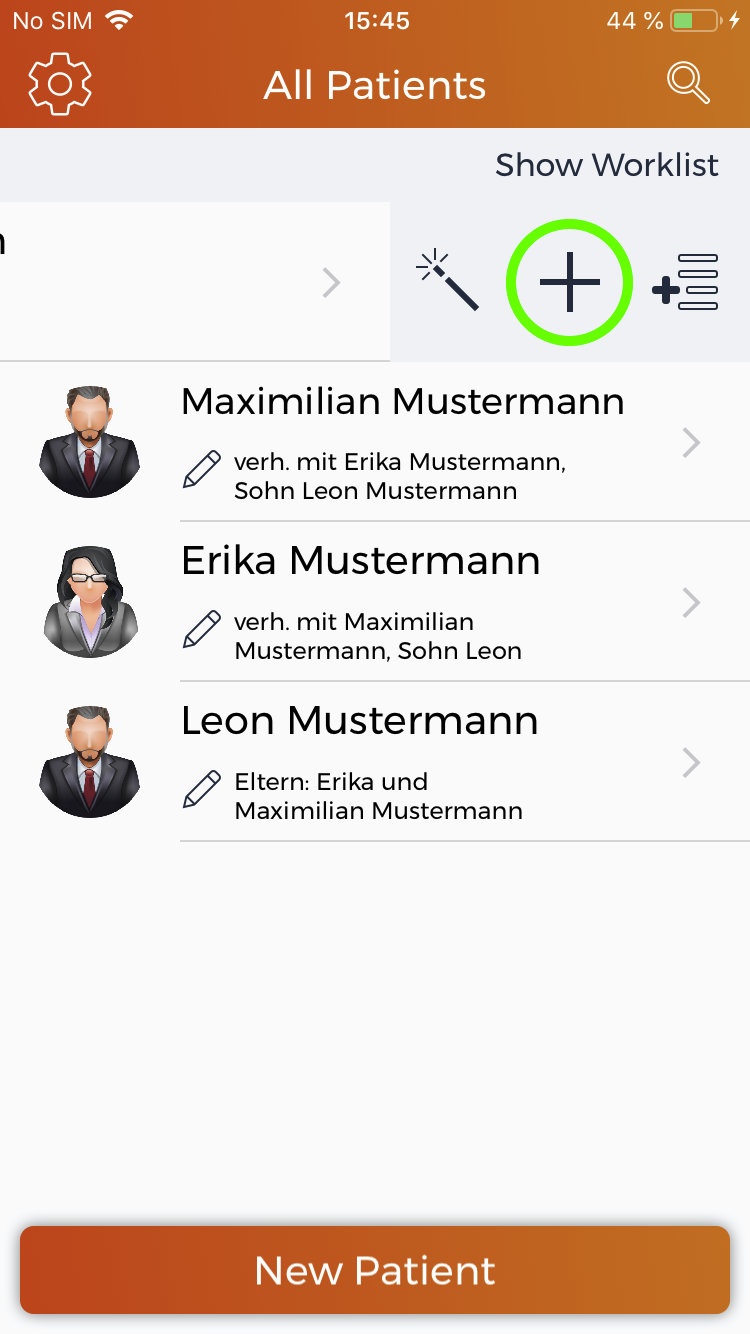
- Select the patient where you would like to create a new image group
- Click on the button „New Image“.
- Or choose the patient where you would like to create a new image group and swipe to the left. Then click on the „+“ icon.
- Now you can start creating a new image group.
- Select the model of dermatoscope which you are using. If you do not use a HEINE dermatoscope choose „Unknown“. The setting stays fixed until you change it again.
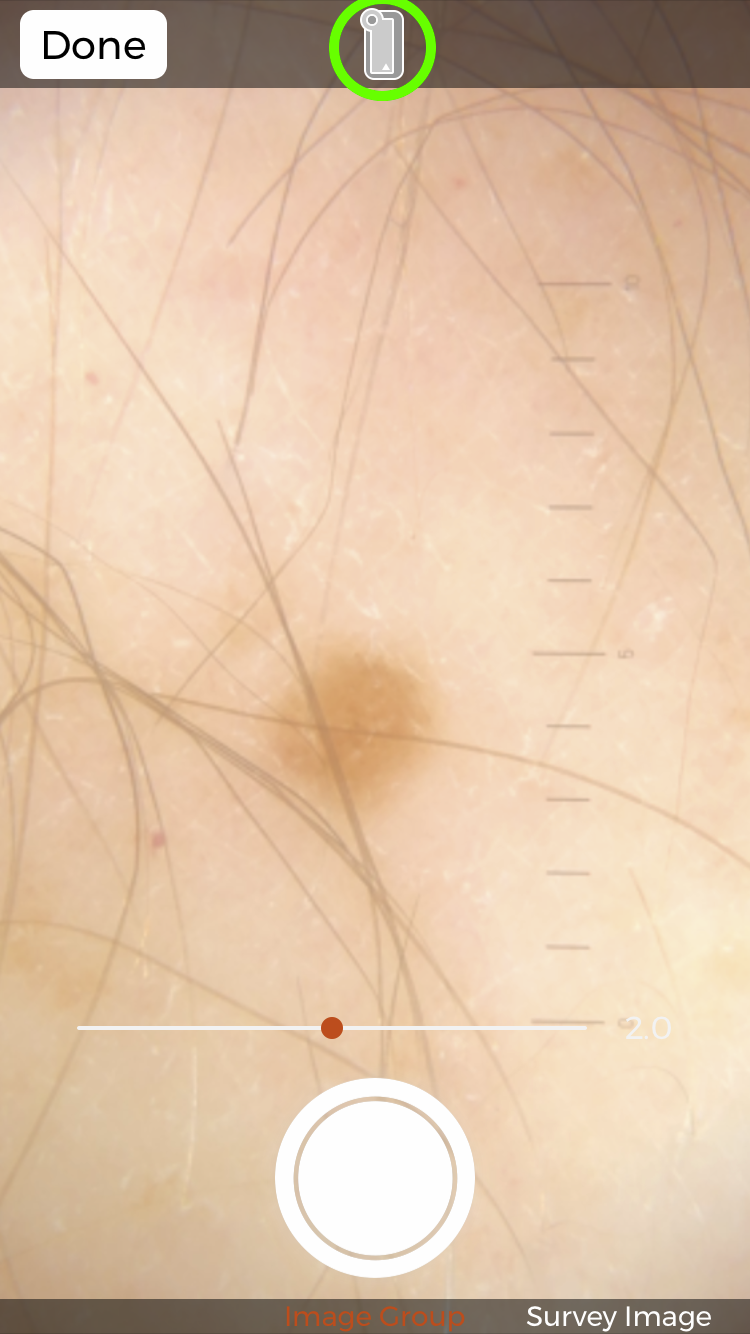
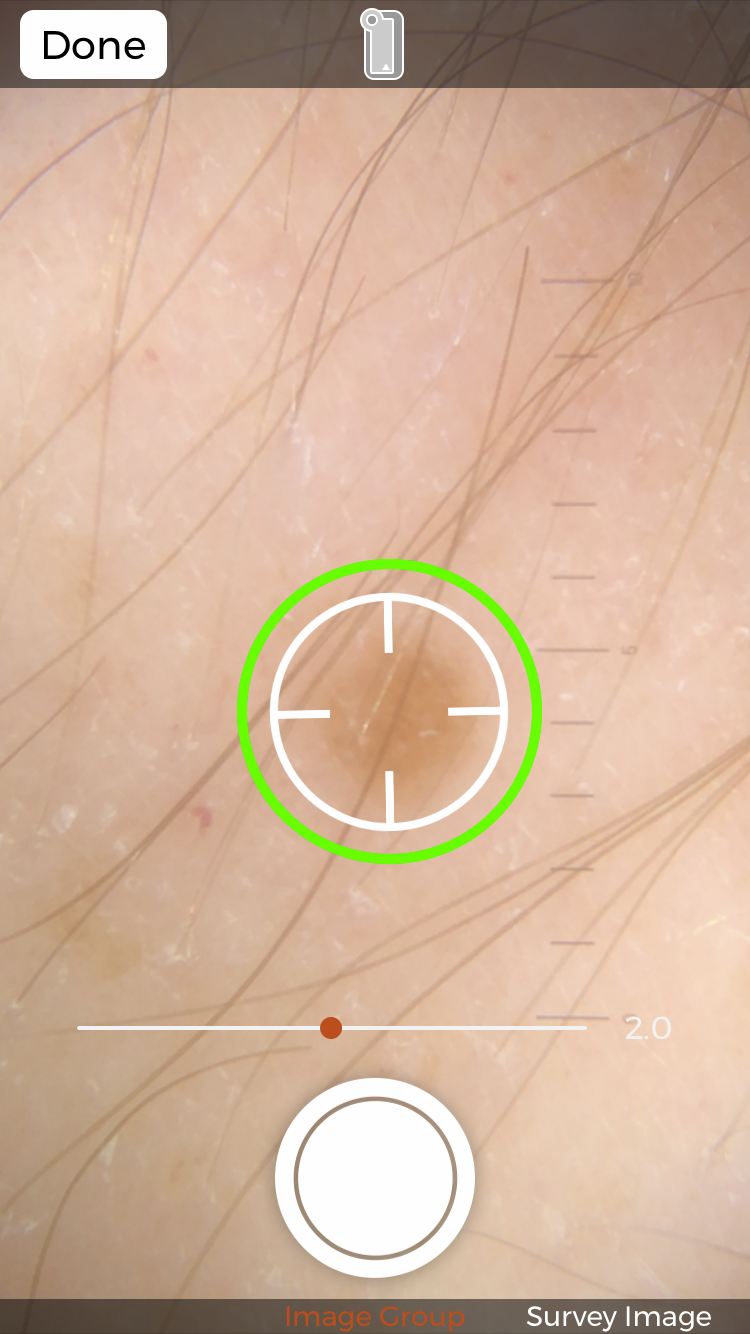
- If necessary, zoom in by using one or two fingers.
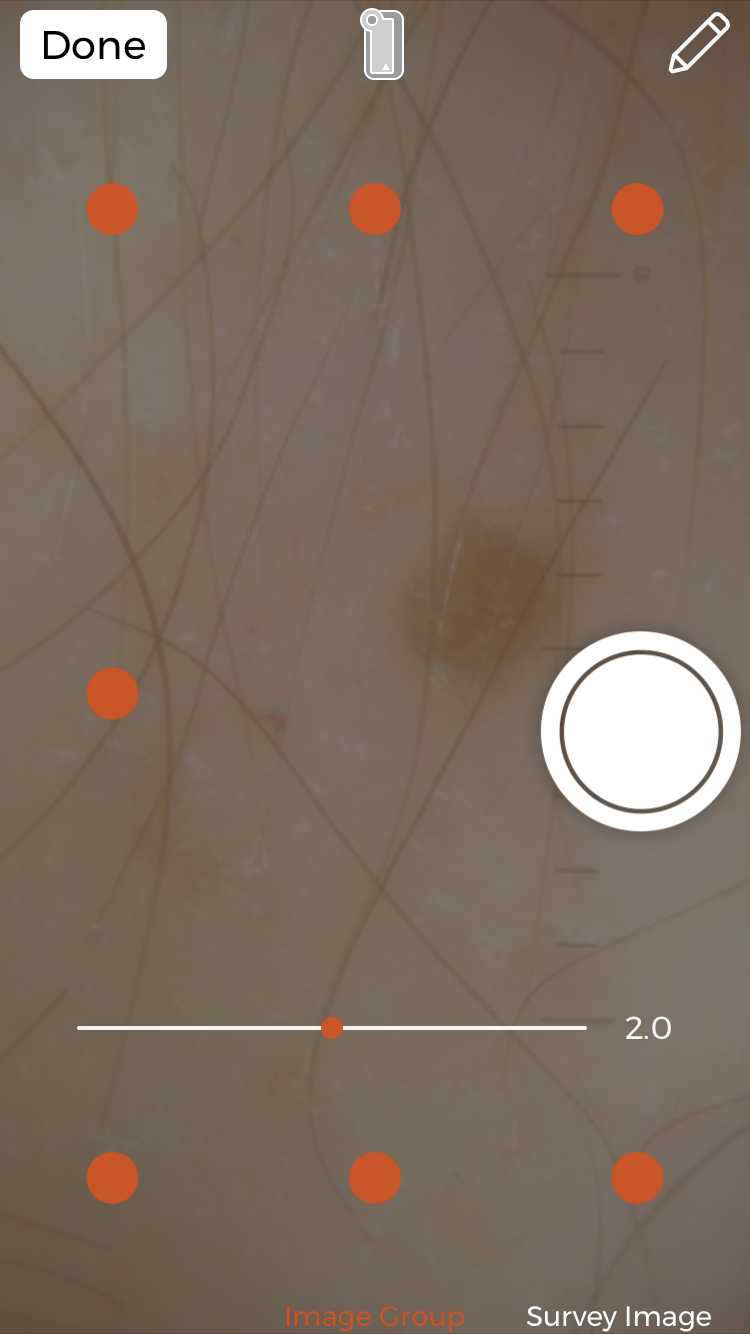
- Tap the detail you want to focus.
- Take the image.
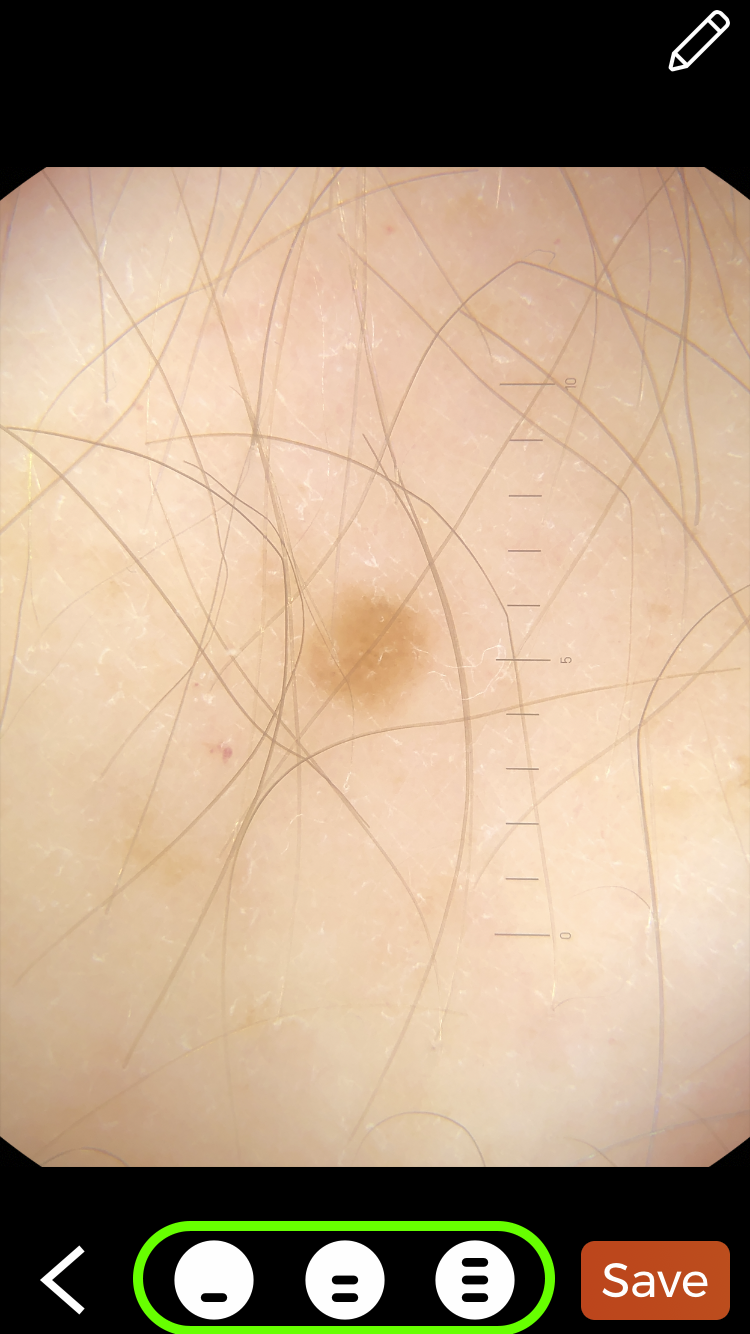
- Rate the image of the mole: green, orange, red.
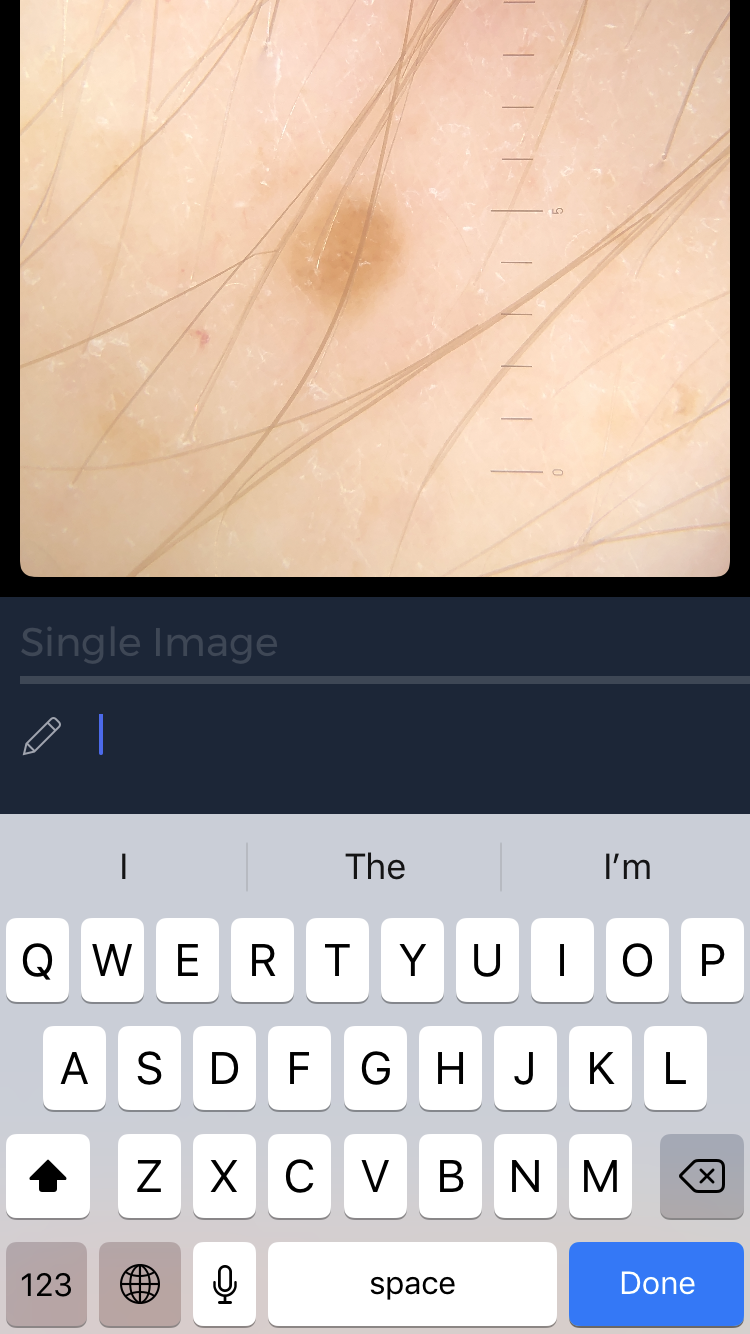
- Add a description if required.
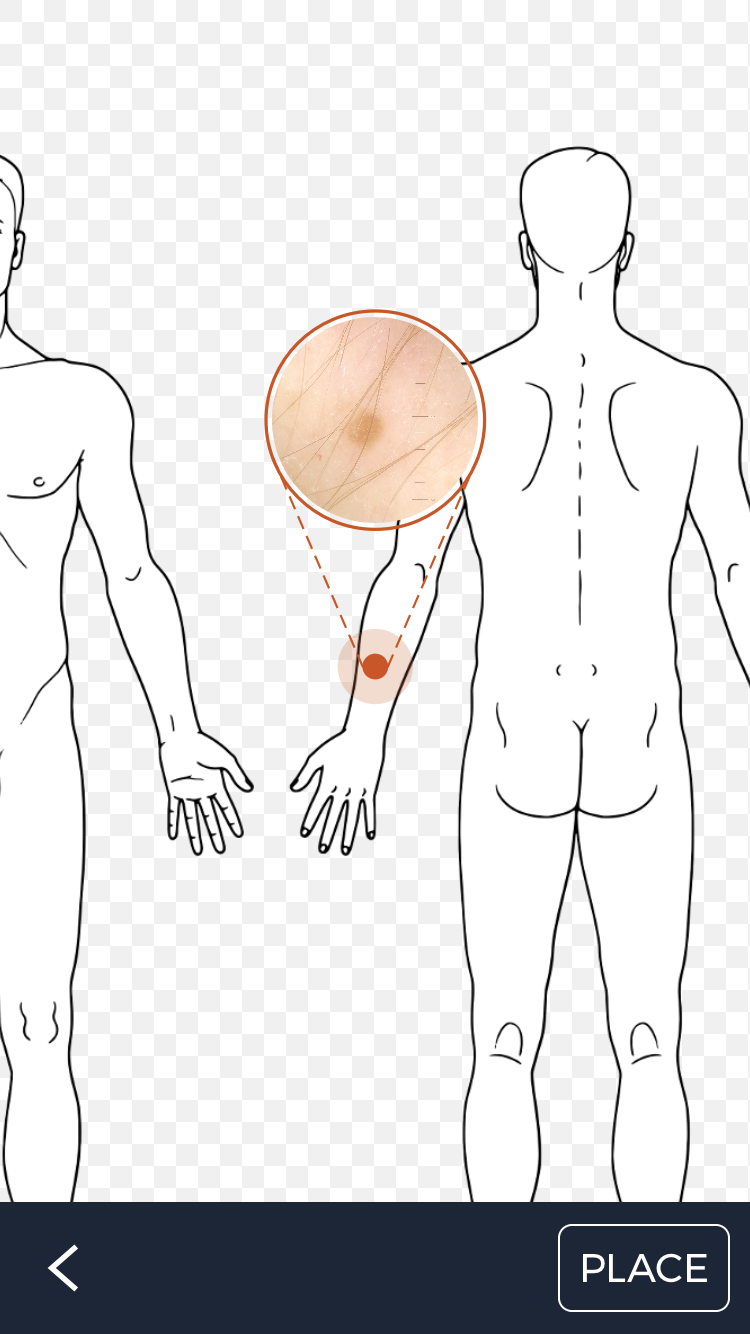
- Save the image and place it on the bodymap. If necessary, zoom in by using one or two fingers.
Was this article helpful for you?
How can I capture a new overview image with detailed image(s)?
- Please use your smartphone without a dermatoscope connected.
- Open the DERManager app.
- Open the patient for whom you would like to capture a new overview image with detailed image(s) and tap the ‘New image’ button.
(Alternatively, you can swipe left directly on the patient’s name and tap the ‘+’ icon.) - Swipe once to the left.
- You can now start capturing a new overview image.
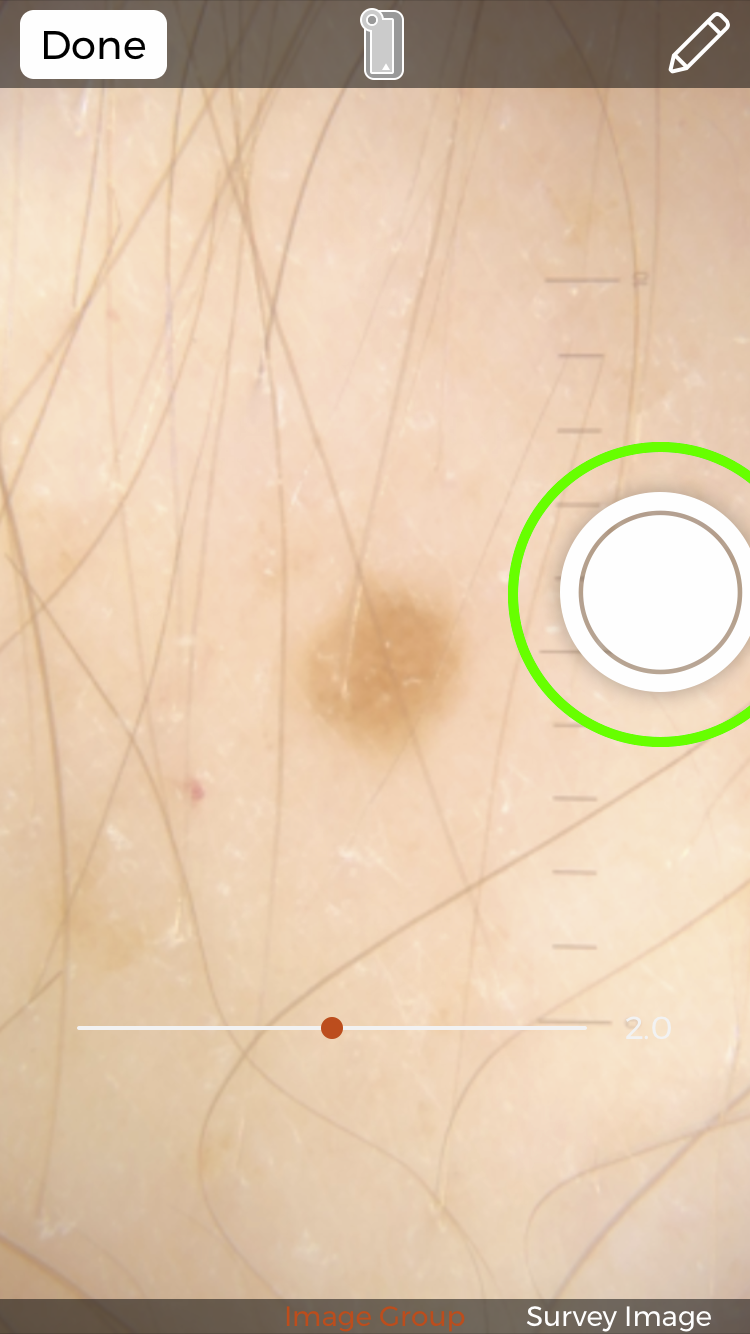
- Select the region of the body you’d like to photograph.
- If necessary, zoom in with one or two fingers.
- Tap the region you’d like to focus on.
- Capture an image.
- Add a description if required.
- Save the image and place it on the Bodymap. Zoom in with one or two fingers for more detailed placement.
- Following placement, you will automatically return to camera mode to capture a detailed image of the mole. Please connect your dermatoscope.
- Select the dermatoscope you are currently using. The setting stays the same until you change it again.
- If necessary, zoom in with one or two fingers.
- Tap the spot you would like to focus on.
- Capture an image.
- Rate the image of the mole: green, orange, red.
- Add a description if necessary.
- Save the image and place it on the overview image.
- You can now add another detailed image to the selected overview image or end the process of capturing detailed images.
Was this article helpful for you?
How can I add a new detailed image to an existing overview image?
- Connect your smartphone to a dermatoscope.
- Open the DERManager app.
- Open the patient you would like to capture a new detailed image of and tap the ‘New image’ button.
(Alternatively, you can swipe left directly on the patient’s name and tap the ‘+’ icon.) - Swipe to the left twice.
- Now select a previous overview image that matches your planned detailed image.
- You can start capturing a new detailed image.
- Select the dermatoscope you are currently using. The setting stays the same until you change it again.
- If necessary, zoom in with one or two fingers.
- Tap the spot you’d like to focus on.
- Capture an image.
- Rate the image of the mole: green, orange, red.
- Add a description if necessary.
- Save the image and place it on the overview image.
- You can now add another detailed image to the selected overview image or end the process of capturing detailed images.
Was this article helpful for you?
Are there alternative ways to trigger a photo?
- In camera mode you can also trigger images by putting your finger on the screen for one second and release.
- Alternatively, you can hold the trigger for one second and move it to one of the eight orange points. Now, the trigger position will remain until you move it again.
- Additionally, you can press the volume button up or down to take an image.
Was this article helpful for you?
Can I delete images in the DERManager app?
Deleting images is only possible in the DERManager web but not in the DERManager app.
Was this article helpful for you?
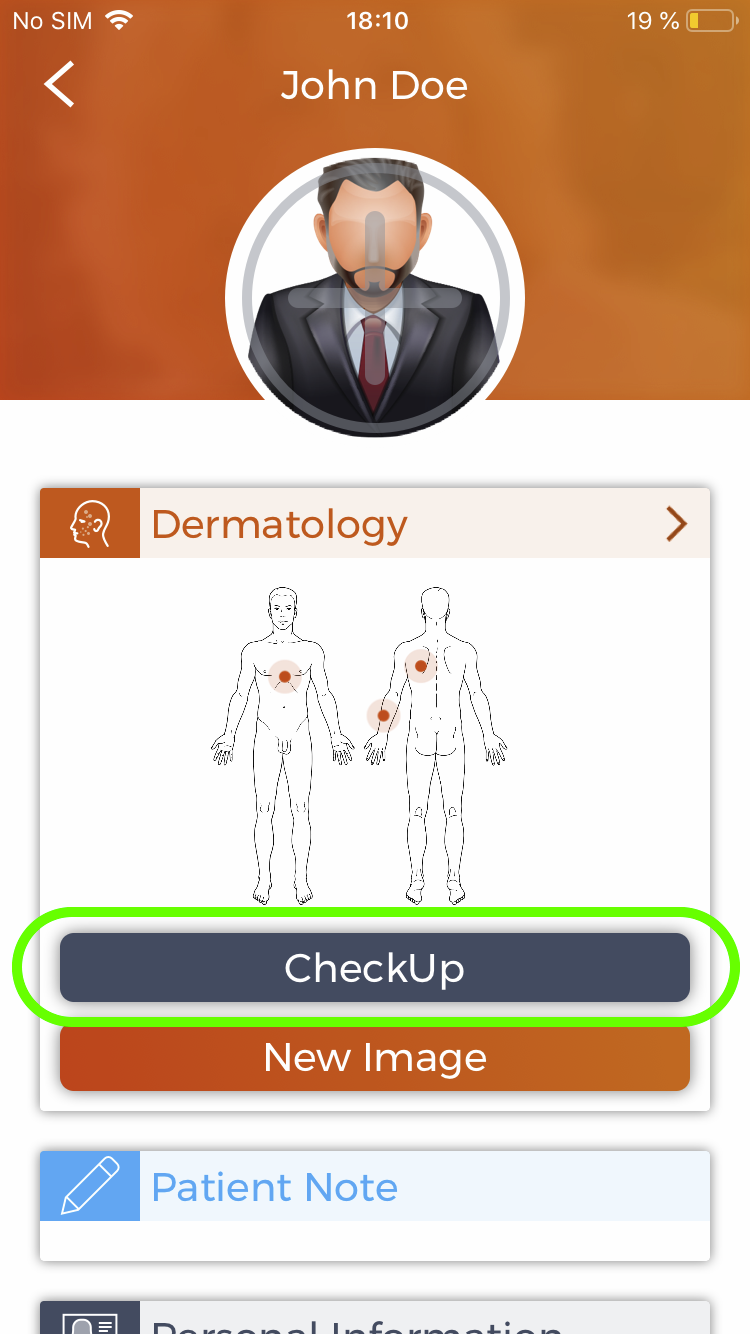
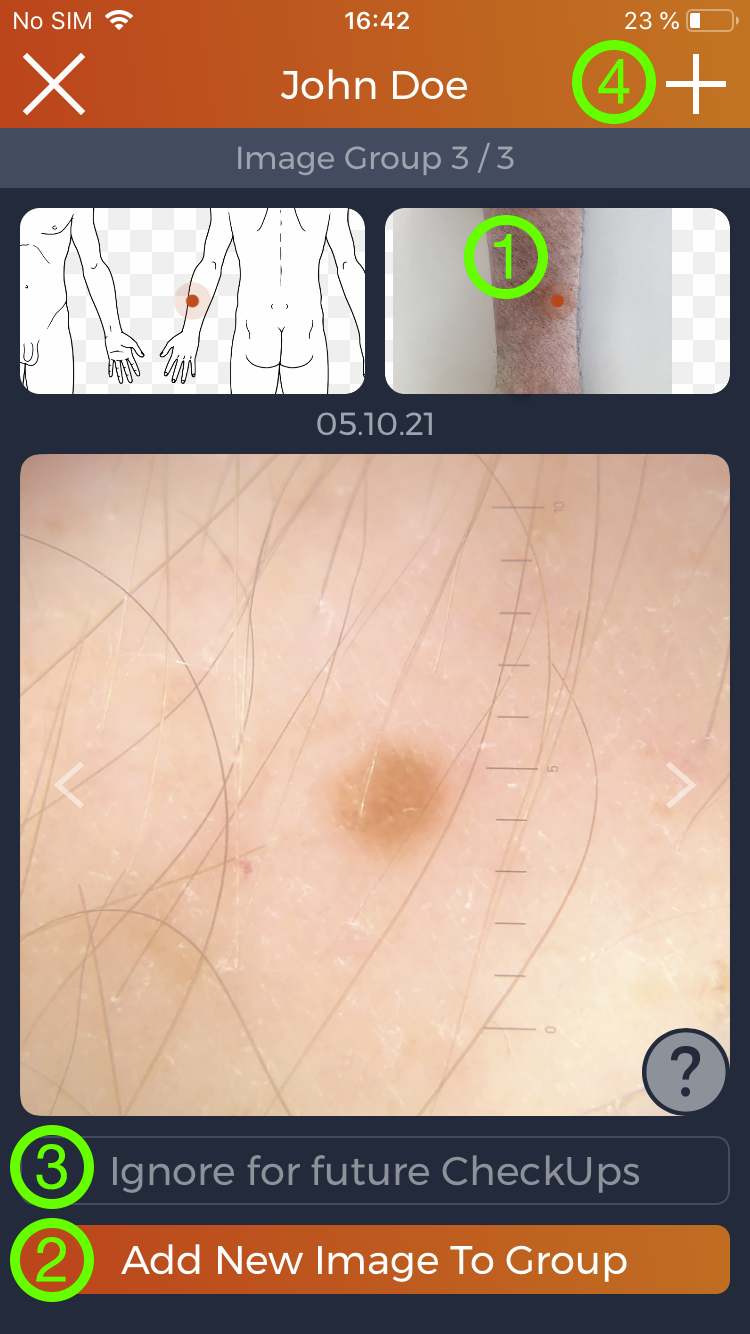
How do I perform a CheckUp examination?
- Connect your smartphone to a dermatoscope.
- Open the patient where you would like to create a CheckUp/Follow-up examination and click on the button „CheckUp“.
(Alternatively swipe directly on the patient’s name to the left and choose the magic stick icon.) - Now you can go through your previously stored images.
- On each page, four actions are possible:
- If you have created a survey image you can tap and hold on the Survey image in the top right corner to enlarge it.
- Add a new image to the image group by using the "Add New Image To Groups" button at the bottom.
- Ignore this particular image group by using the "Ignore for future CheckUps" button at the bottom. It will still be accessible in the DERManager, but not presented to you in the next CheckUp.
- Add an entirely new image by using the "+" button in the upper right corner.
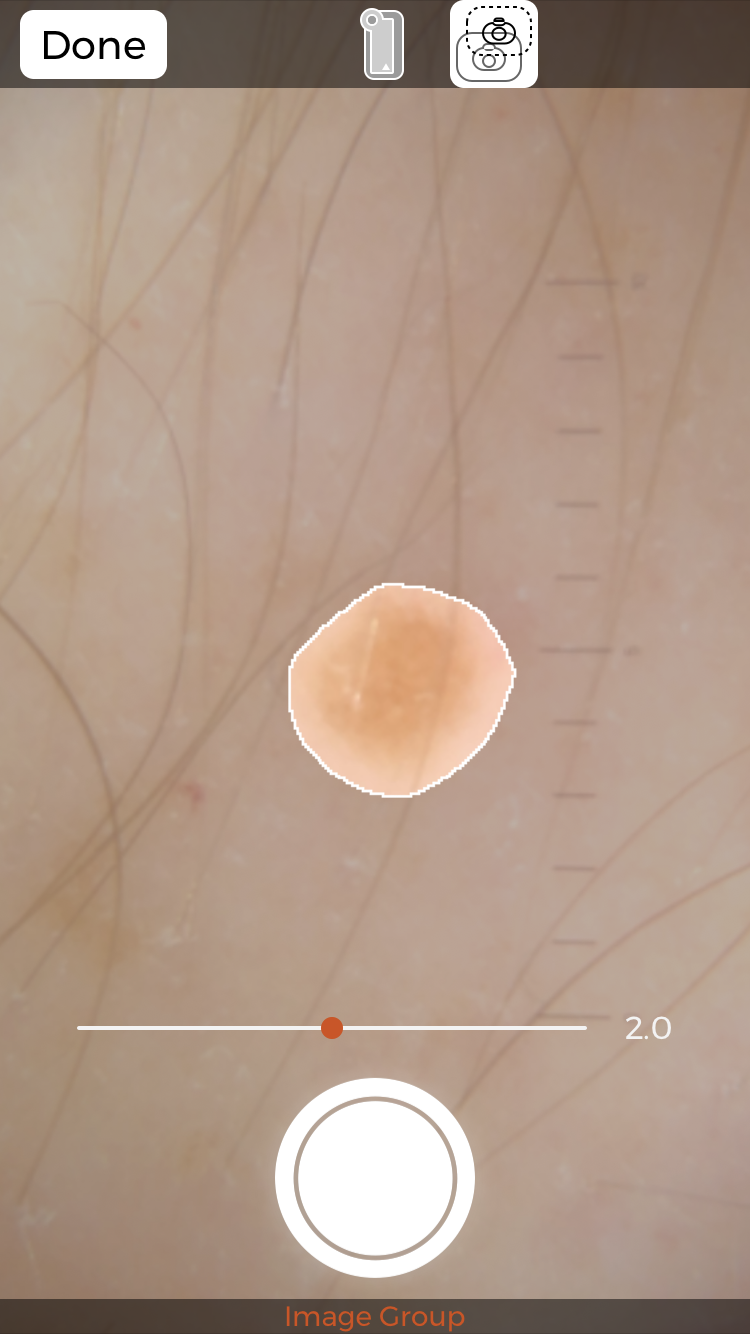
- The "Add New Image To Groups" button will open the camera mode. Now the contour function displays a mask of the edges of the last mole. The used zoom factor of the last image will be preselected.
Was this article helpful for you?
Why are none or not all images shown in the CheckUp?
- Only images with a recording date of the previous day or older will be shown in the CheckUp area.
- Furthermore images selected as “Ignore for future CheckUps“ will not be shown as well.
Was this article helpful for you?
How can I add ignored images back to the CheckUp?
In the DERManager Web, remove the tag "ignoredOnCheckUp" from the corresponding image series.
Was this article helpful for you?
Will patient data from the DERManager app be stored on my iPhone?
No. All data is stored exclusively in our DERManager cloud system.
Was this article helpful for you?
What happens if the internet connection is lost during the examination?
The DERManager app notifies you of the connection error and prompts you to retransmit. If your connection fails permanently, you will have to capture the image again at a later time.
Was this article helpful for you?
Settings
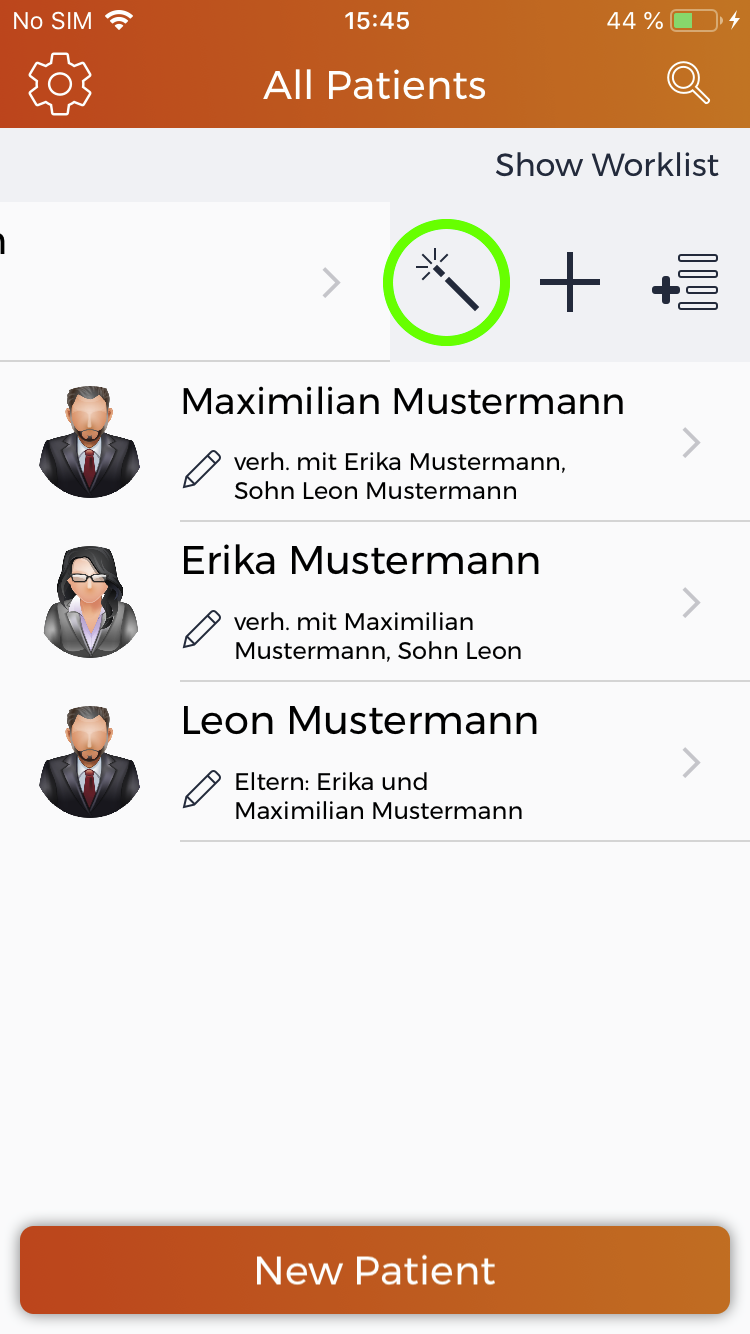
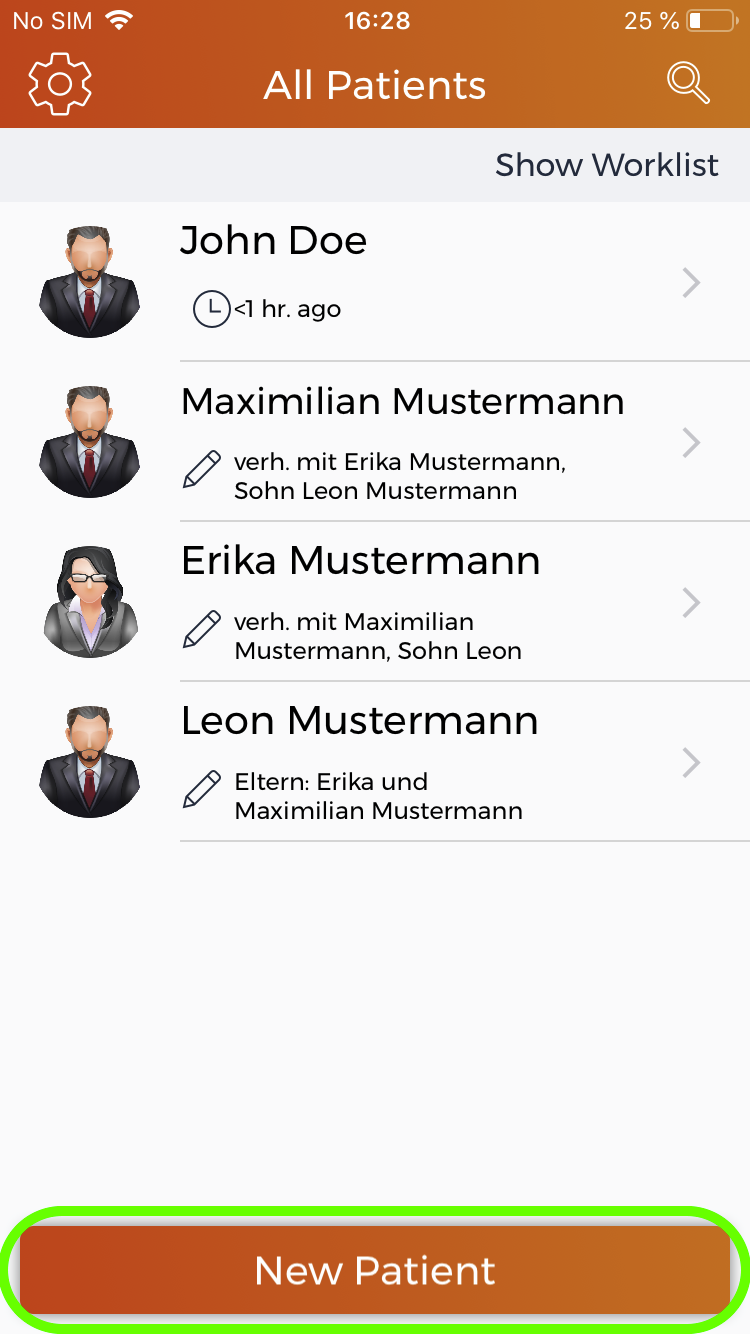
How can I add a patient in the DERManager app?
Click „New patient“ at the bottom of the start screen. If the button “New patient” is not shown to you, you will need to activate it in the settings.
Was this article helpful for you?
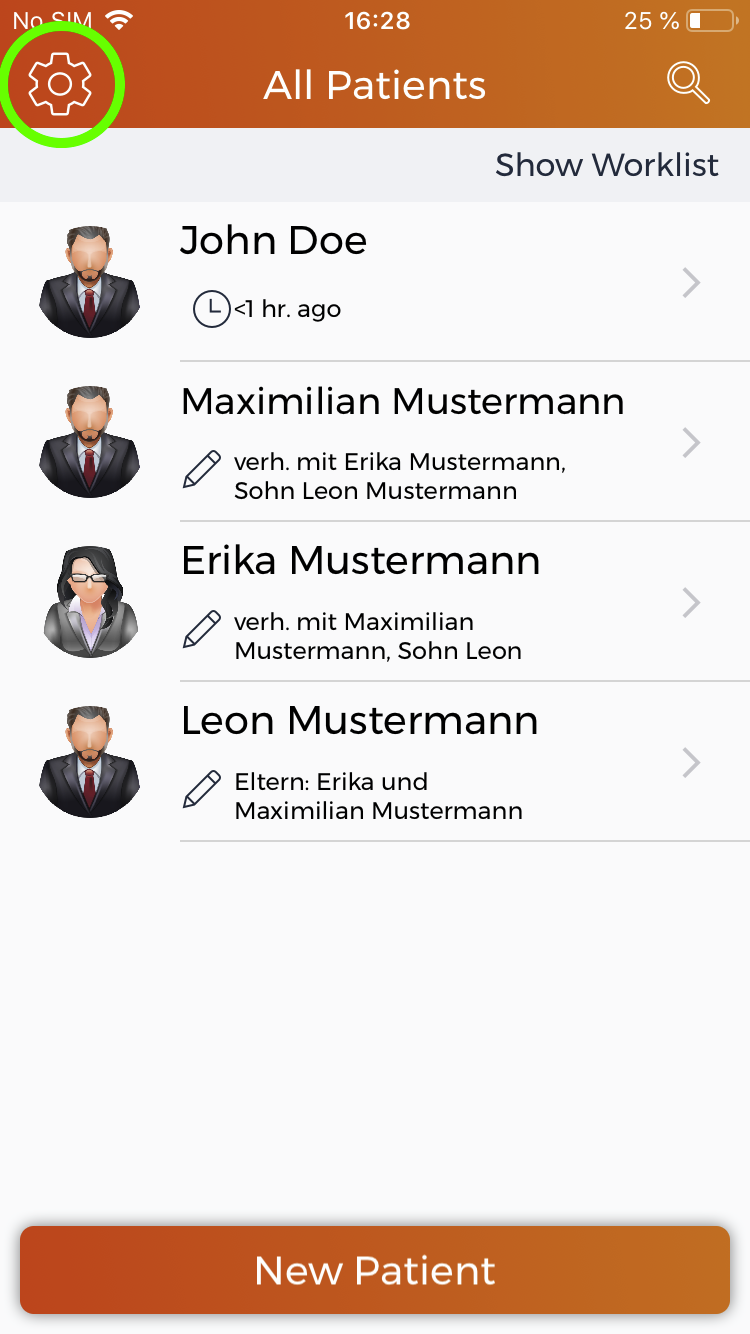
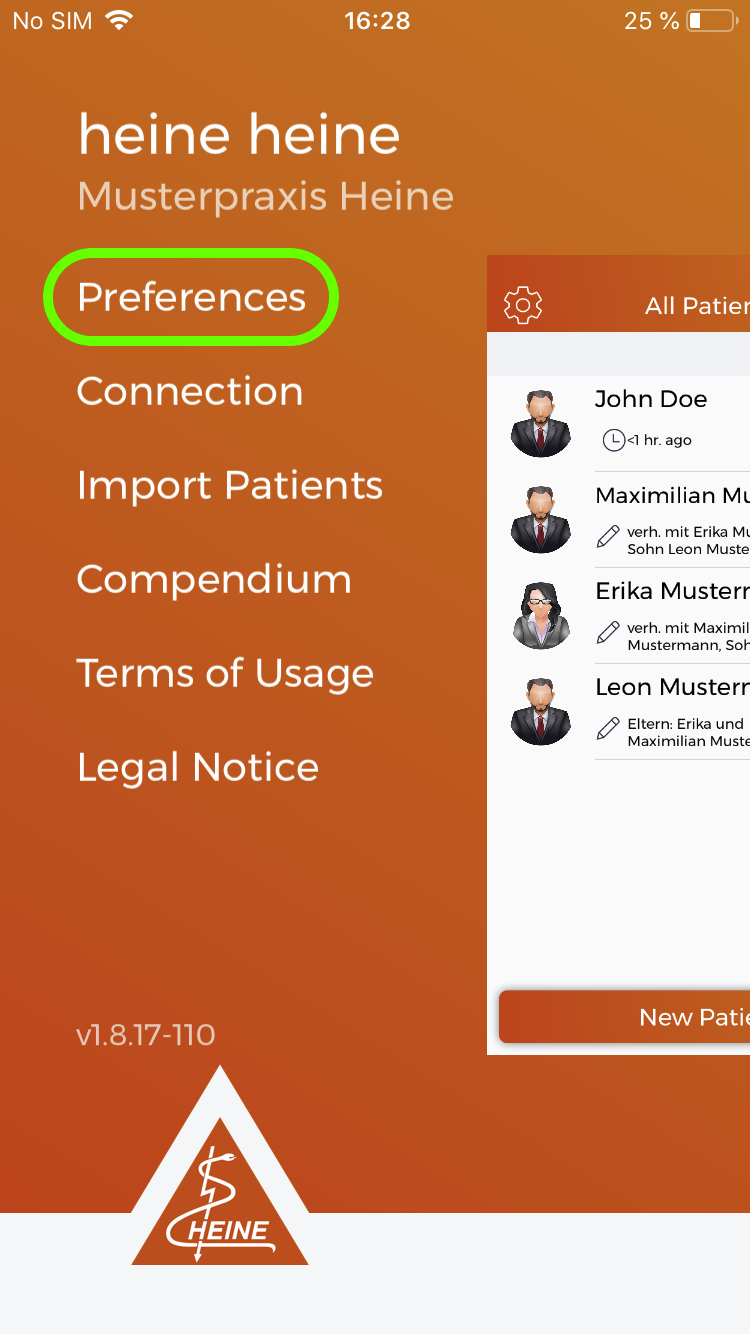
How do I enter the settings in the DERManager app?
- Click on the gear wheel in the top left corner.
- Click on „Preferences“ on the top of the list.
- Now you are able to configure your settings .
Was this article helpful for you?
Which settings can be changed in the DERManager app?
- Image quality
- Displayed worklist
- Display new patient button on the start screen
- Initial camera zoom
- White balance temperature
- Availability of white balance setting in every image mode
- CheckUp configuration for showing all Image Groups or only them of the last visit
Was this article helpful for you?
How can I see what version of the DERManager app I am using?
- Click on the gear wheel in the top left corner.
- Now you are able to see which version of the app you are using .
Was this article helpful for you?
How can I update the DERManager app?
You can update the DERManager app in the App Store.
Was this article helpful for you?
Can I use the DERManager app without a dermatoscope?
You are able to take Survey Images, but you are unable to capture dermoscopic images. We recommend for you to use one of the HEINE dermatoscopes which is connectable to your Smartphone. For best results use a HEINE iC1 dermatoscope.
Was this article helpful for you?
Can I use the DERManager app offline if I have no internet connection?
No, you can not use the DERManager app without internet connection.
Was this article helpful for you?
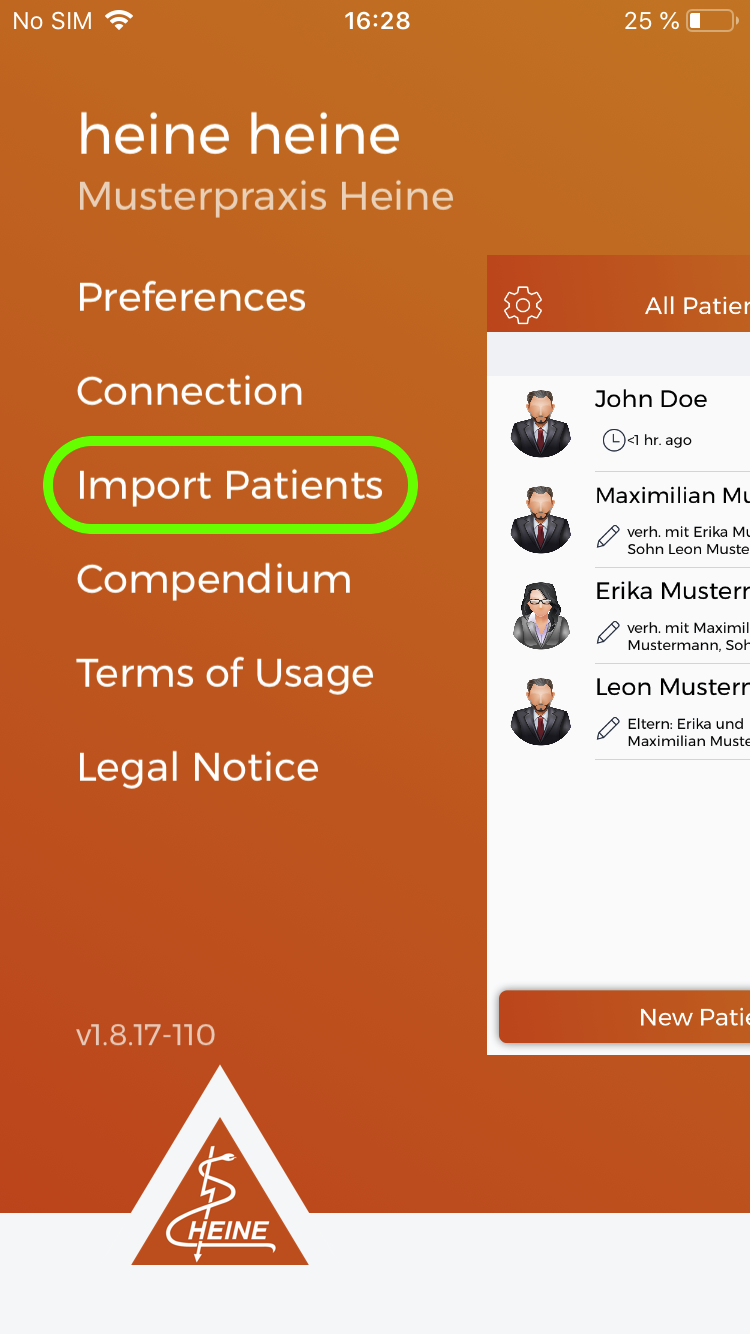
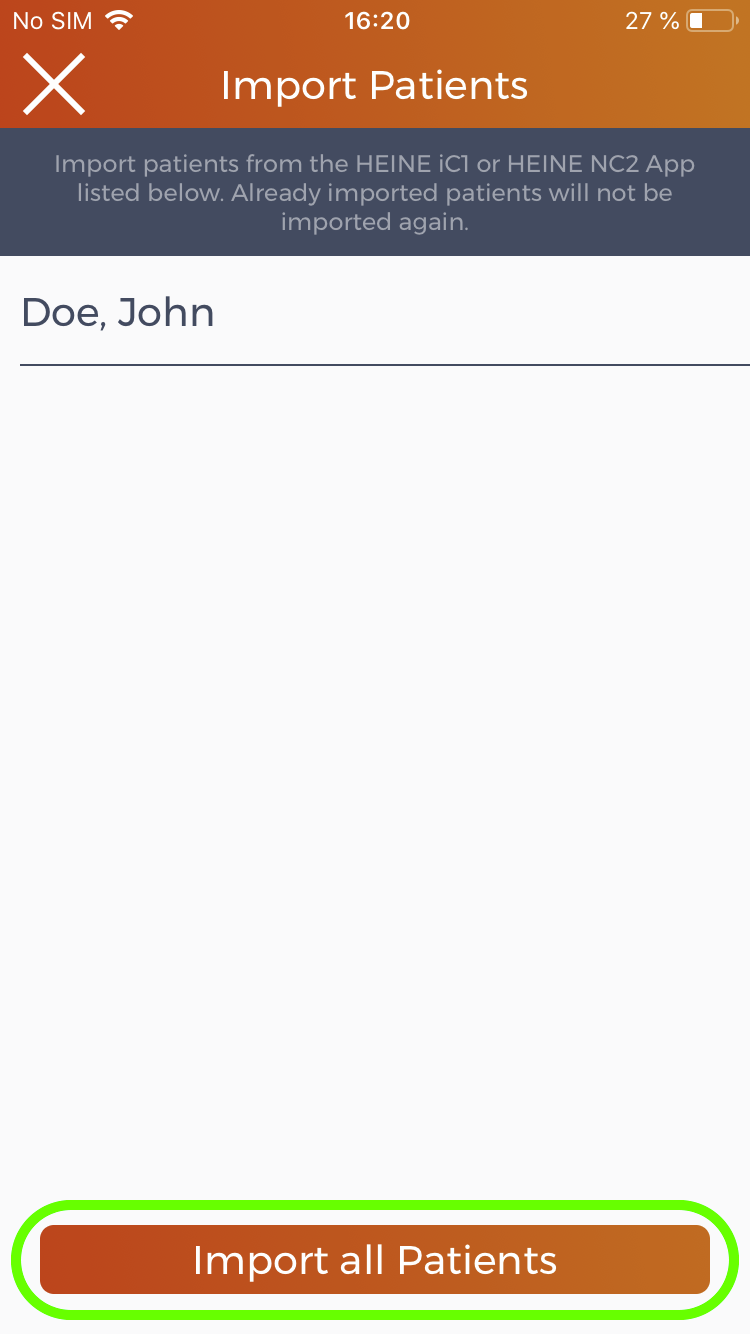
How can I transfer patients and their images from the HEINE iC1 app or the HEINE NC2 app?
- Click on the gear wheel icon in the top left corner.
- Click on „Import Patients“ in the list.
- Click on „Import all Patients“.
- Now all patients and their images will be transferred to the DERManager.
- If this did not work, please allow the DERManager app access to all photos in your iPhone settings.
Was this article helpful for you?
How can I transfer patients and their images from the HEINE DERM app?
Currently it is not possible to transfer images from the HEINE DERM app to the DERManager, but we are working on a solution.
Was this article helpful for you?
Dermatoscopes + Smartphone Cases
Which dermatoscopes can I use with DERManager?
For best results we recommend using the HEINE iC1 dermatoscope as well as the HEINE DELTA 30 and the HEINE DELTAone dermatoscopes with the appropriate adaptor solution. Alternatively, you can use any other dermatoscope with smartphone connectivity. Please acknowledge that HEINE does not take any responsibility for the functionality with non-HEINE devices.
Was this article helpful for you?
Which iPhones can I use with DERManager?
You can use any iPhones beginning from iPhone 6. Please check if a suitable adaptor is available for your iPhone on the HEINE website.
Was this article helpful for you?
Which Smartphone Cases are available?
You can find our available Smartphone Cases here.
Was this article helpful for you?
How do I disconnect the HEINE iC1 from the mobile phone case on my iPhone?
- Press down the small lever at the bottom of the iPhone.
- You can then slide the iC1 upwards and separate it from the mobile phone case.
Was this article helpful for you?
Troubleshooting
I cannot connect to my DERManager app. What can I do?
Check the login data (user name + password)
- You received these in the e-mail after registration. If they have been changed, please contact your DERManager administrator.
Check that you have installed the latest version of the app.
- Open the App Store and check if there is an update available for the DERManager app.
Check if you have an active internet connection.
- Open any Internet page in a browser (e.g.: Safari, Google Chrome, Microsoft Edge).
Check if your iPhone is on the latest iOS version.
- Open the settings on your phone.
- Select software update.
Was this article helpful for you?
My DERManager app does not start. What can I do?
Check that you have installed the latest version of the app.
- Open the App Store and check if there is an update available for the DERManager app.
Check if you have an active internet connection.
- Open any Internet page in a browser (e.g.: Safari, Google Chrome, Microsoft Edge).
Check if your iPhone is on the latest iOS version.
- Open the settings on your phone.
- Select software update.
Was this article helpful for you?


