DERManager Web
The DERManager Web is the software used to manage your patients on your computer and/or tablet.
- Create patients
- Share/Edit/Delete patient’s data
- Compare/Assess/Delete images
- And much more
Click here to login.
Skin Imaging
How can I compare images that have been captured?
- Select the patient from the patient overview.
- Tap the ‘Show series of images’ button within the Patient view.
- You now have 4 different ways of comparing the patient’s images. Navigate through the buttons in the top right-hand corner of the screen to change the view.
- Individual image: Only 1 image of the patient is shown. Ideal for displaying a magnified view of the dermatological image taken.
- 2-image comparison: Display 2 images of the patient side-by-side. Ideal for directly comparing images.
- Overlay comparison: Place 2 images of the patient one on top of the other. Ideal for analysing structural changes of the skin in more detail.
- 4-image comparison: Compare up to 4 images with one another. The images can be moved, centred and rotated using the computer mouse or, alternatively, using the tiles next to the image(s).
Was this article helpful for you?
How do I change the severity rating for an image?
It can be changed within the detailed image view by clicking on the colour.
Was this article helpful for you?
How do I relocate an image?
- Open the bodymap
- Select an image and use „Move images“ to drag and drop the mole position to a new location on the bodymap.
Was this article helpful for you?
How do I upload local images?
You have 2 possibilities:
- Create a new image series.
- Click on „+“ on the left side within the patient view.
- Drag and drop or choose the position by clicking on the bodymap.
- Upload a local image and enter any additional information needed.
- Add a new image to an already existing image series.
- Click on „+“ on the top right corner in the image comparison mode to add an image in a pre-selected area.
- Upload a local image and enter any additional information needed.
Was this article helpful for you?
What is the ABCD Score in DERManager?
The ABCD Score of the DERManager is a system in BETA mode for testing, usable in the DERManager web. You can also support the future accuracy of the tool by providing feedback via the “Feedback button” within the ABCD Score.
Was this article helpful for you?
How can I export my data?
You have 4 options for exporting your data:
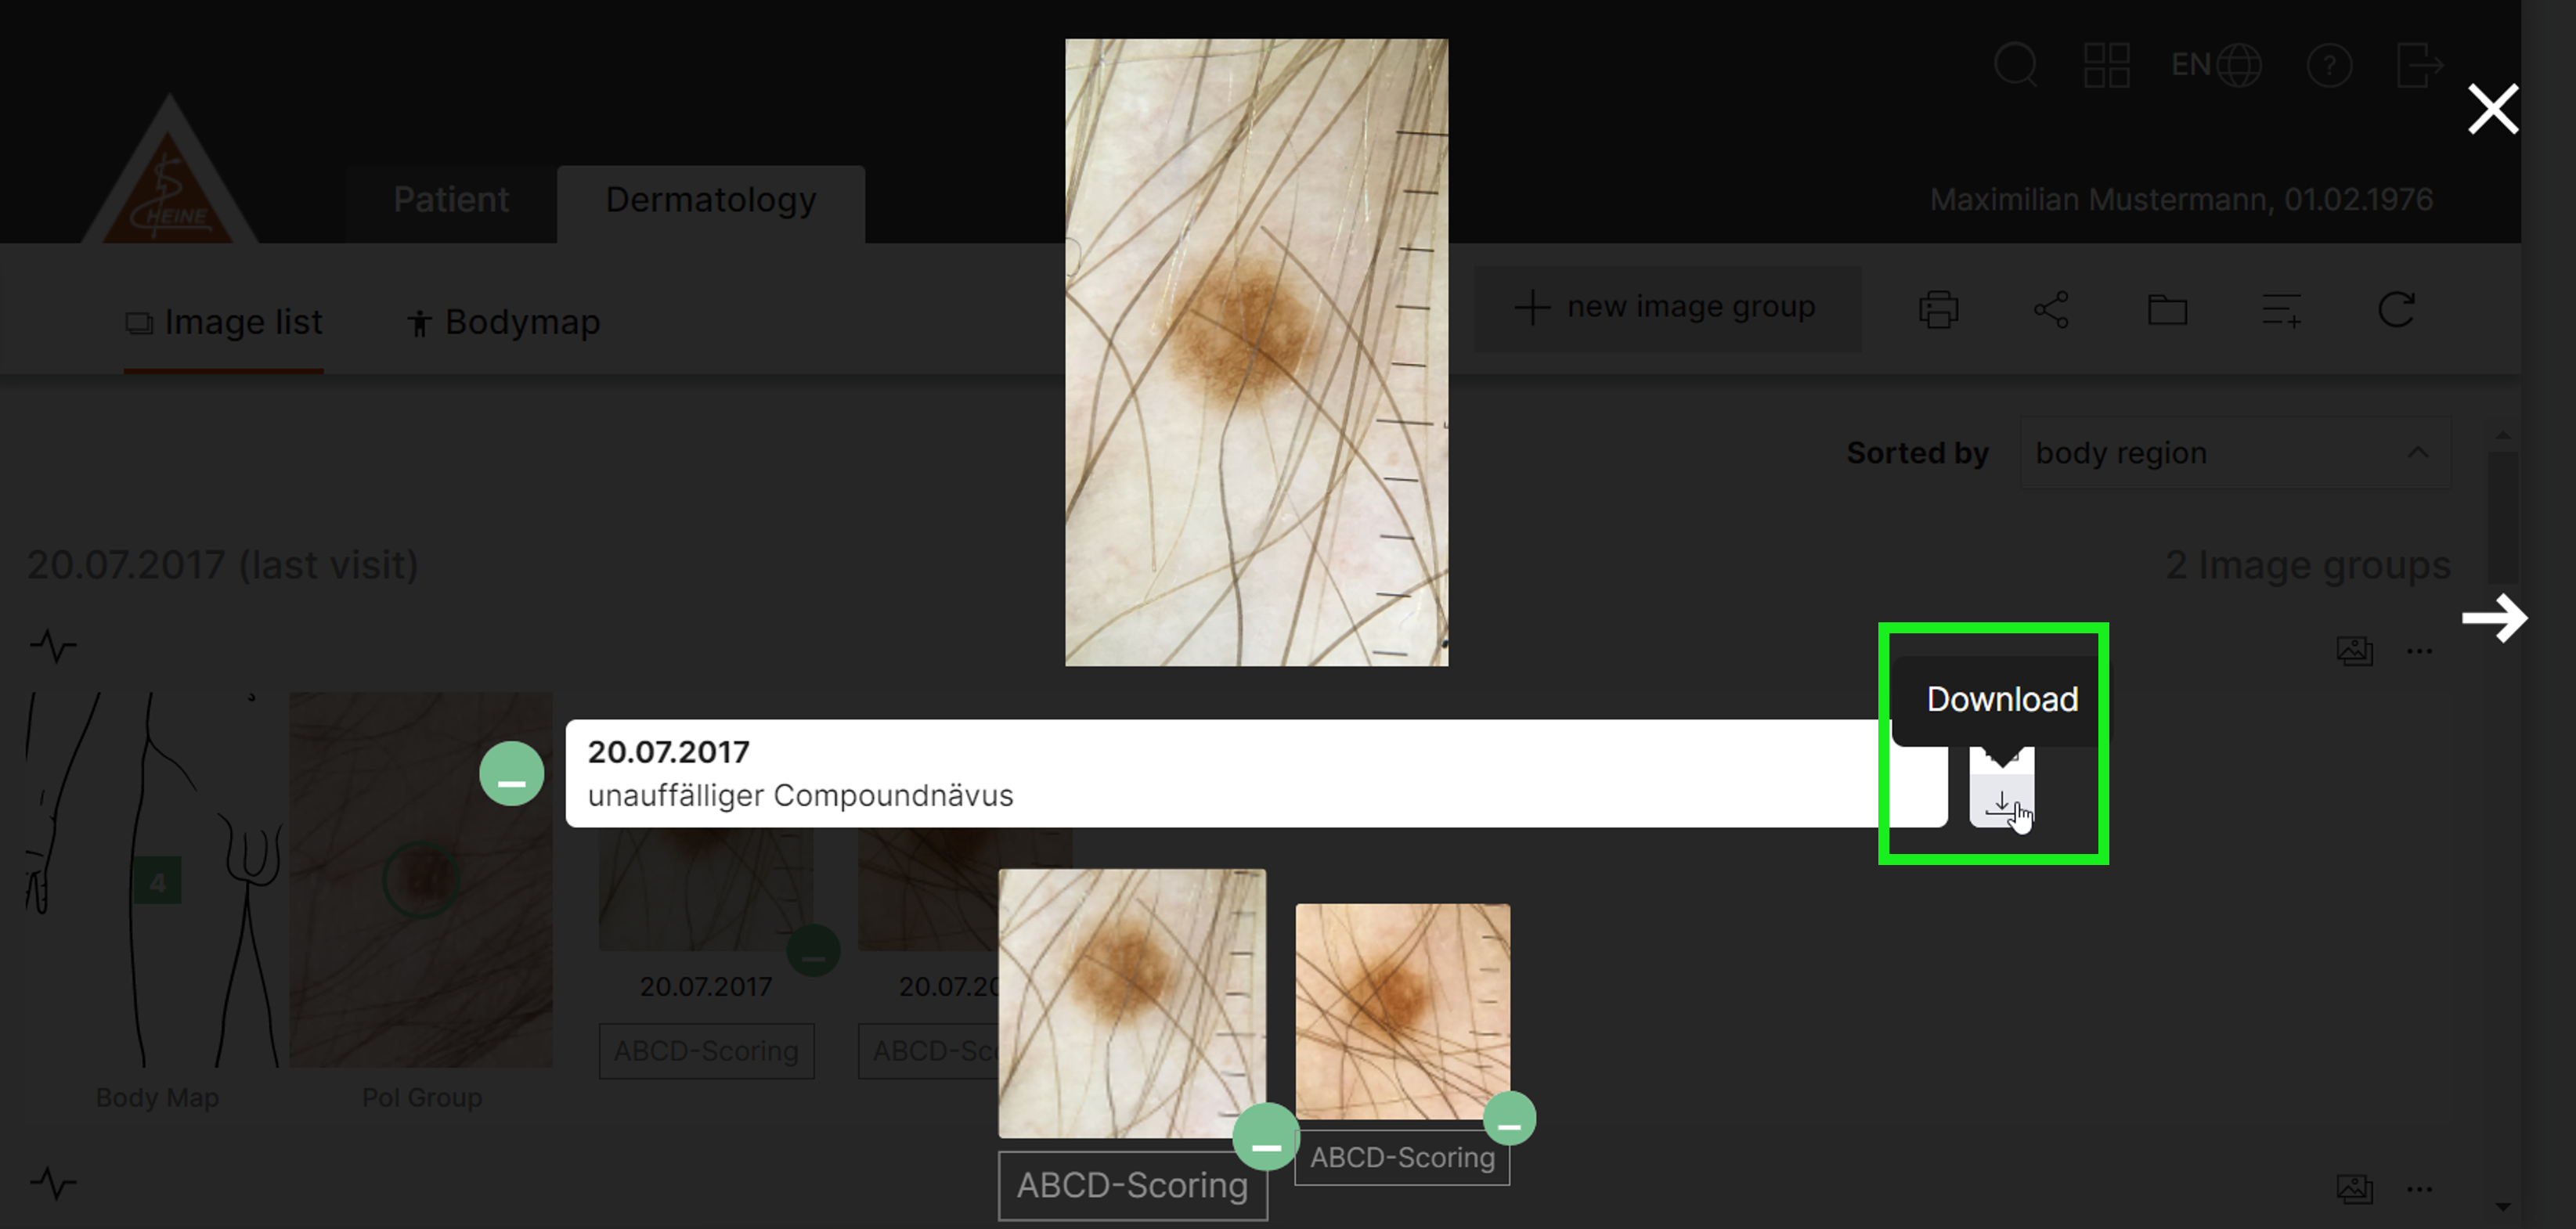
- Export an individual image:
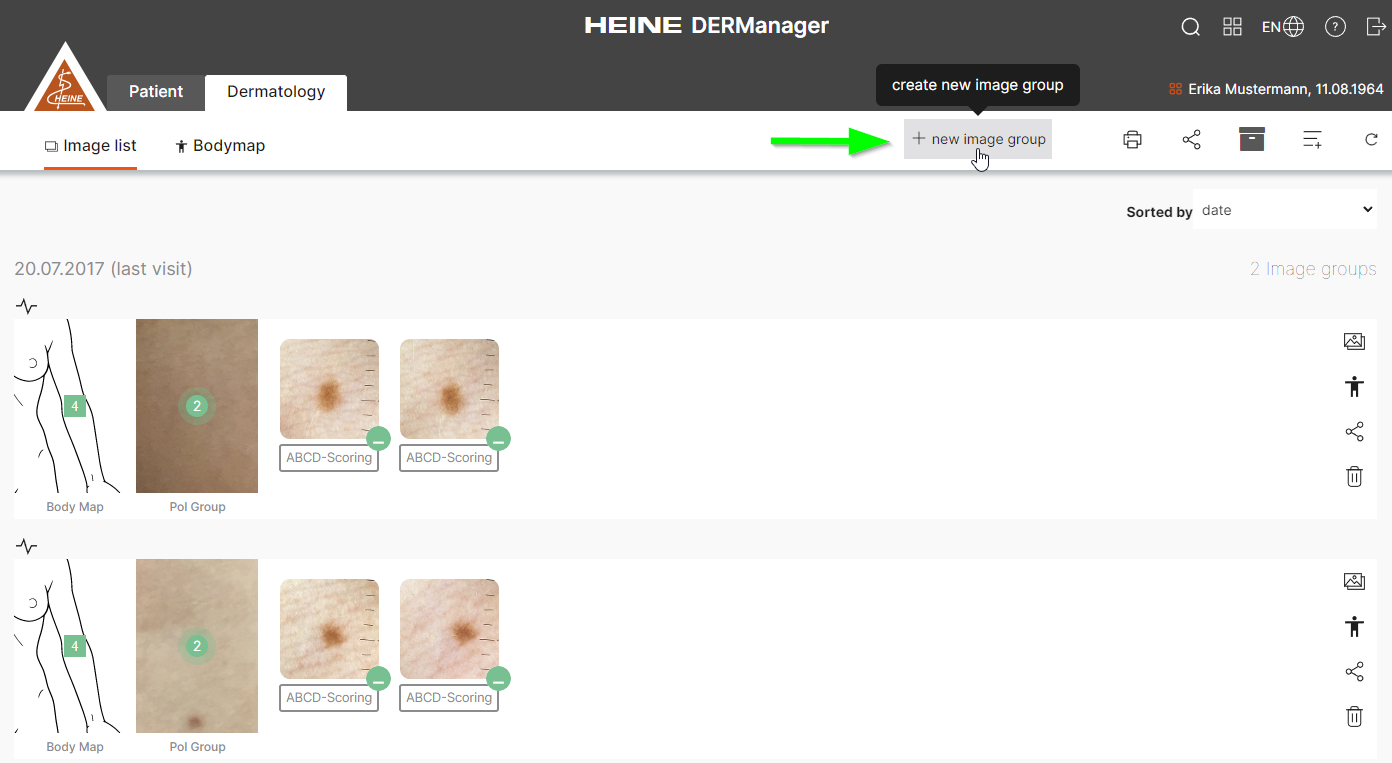
- Select the patient from the patient overview.
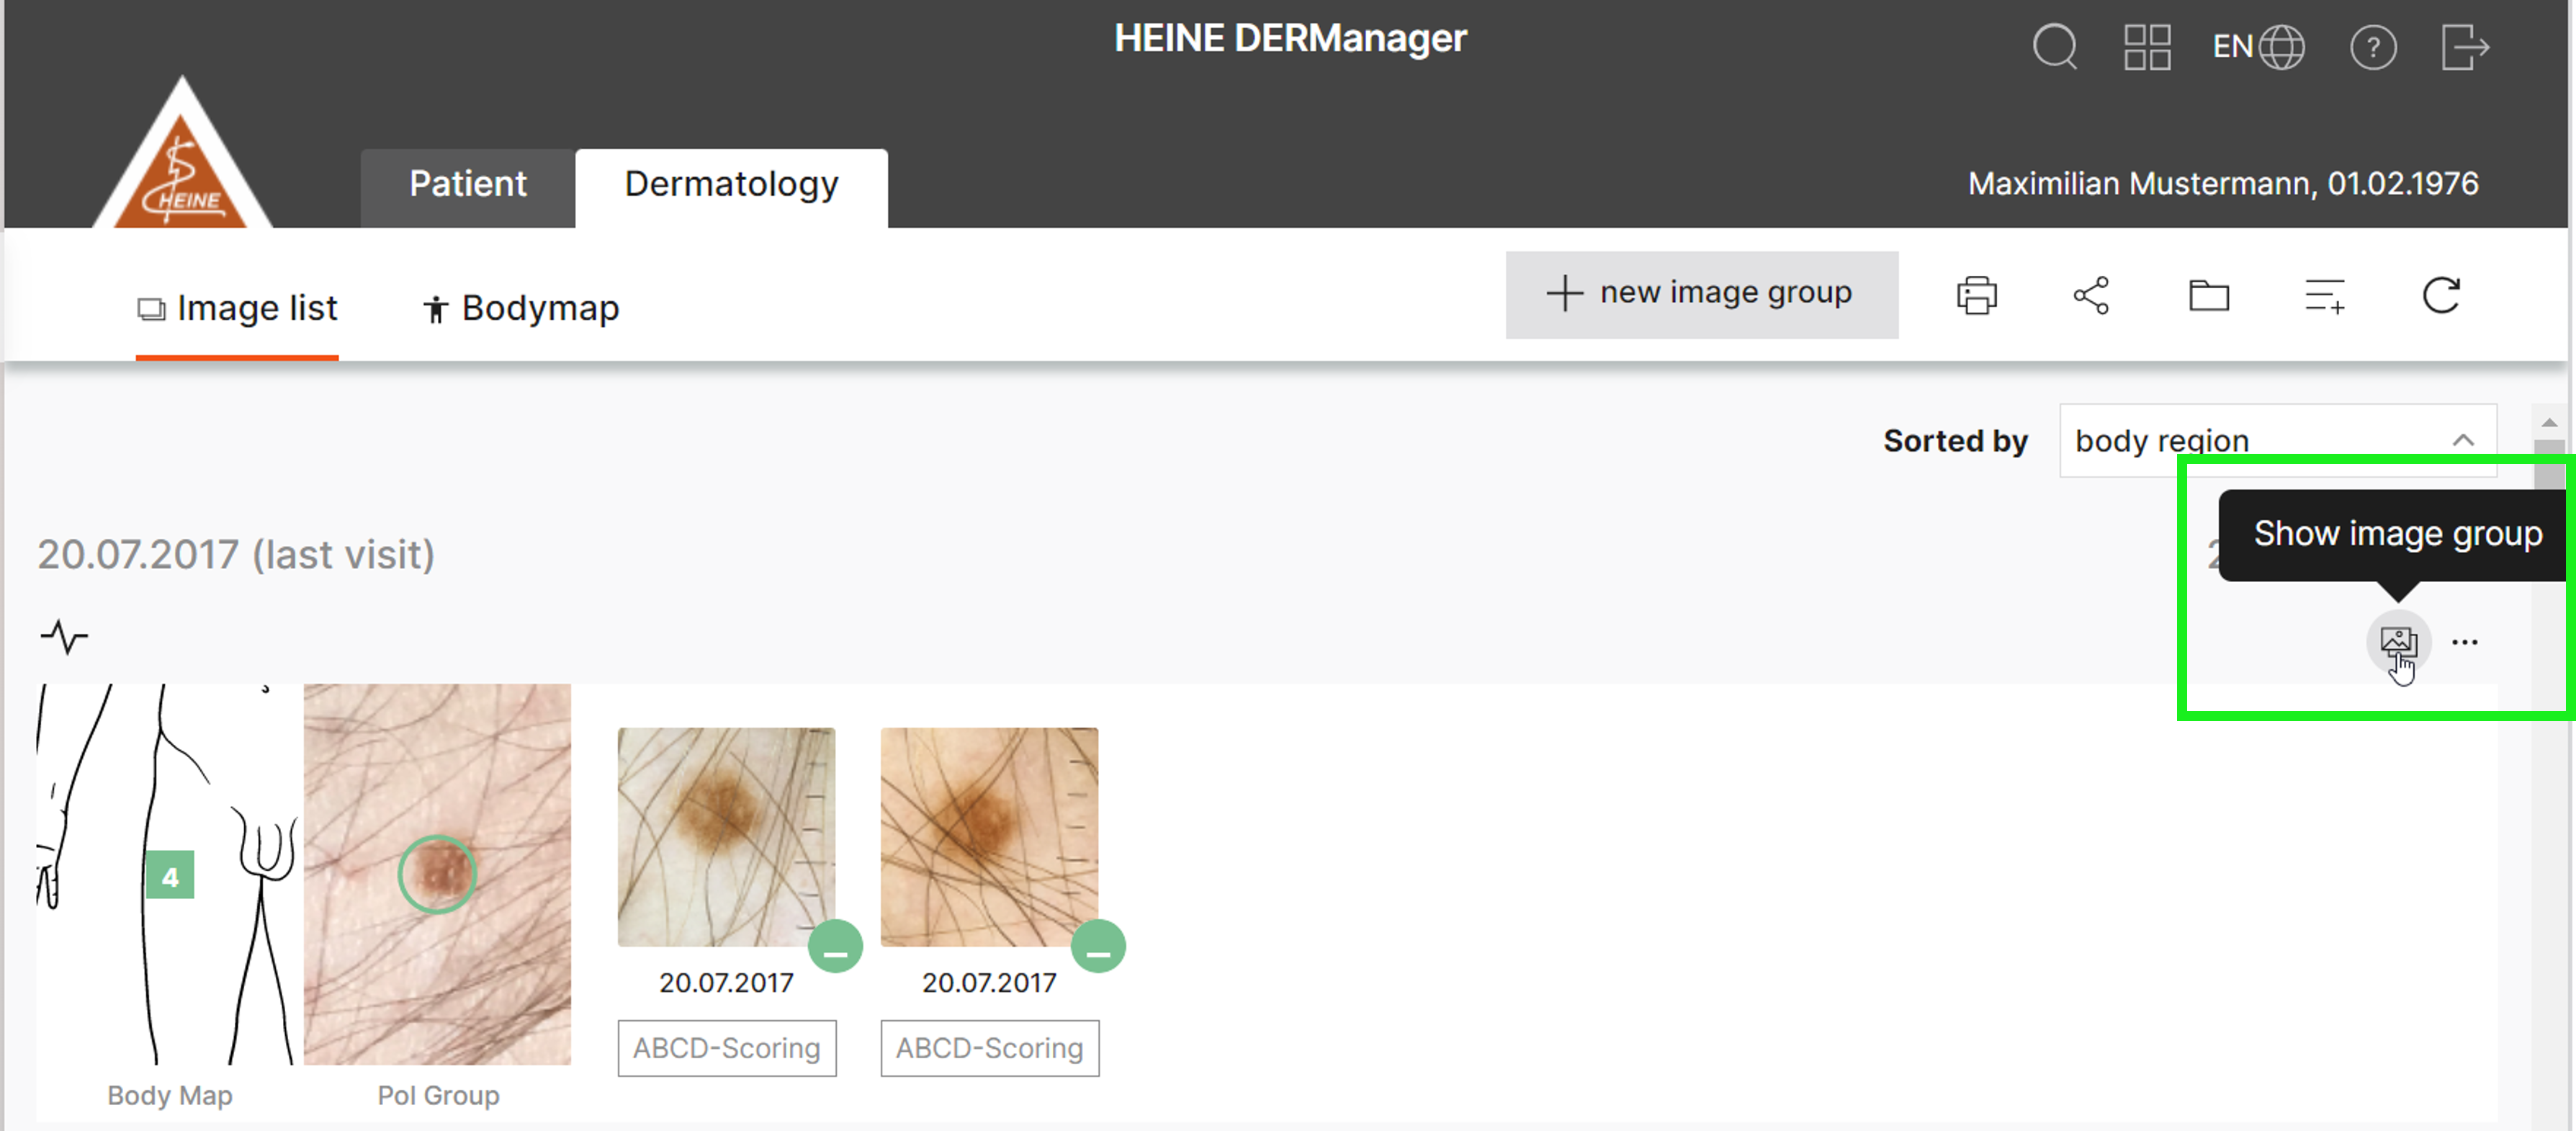
- Tap the “Show image group” button within the patient view.
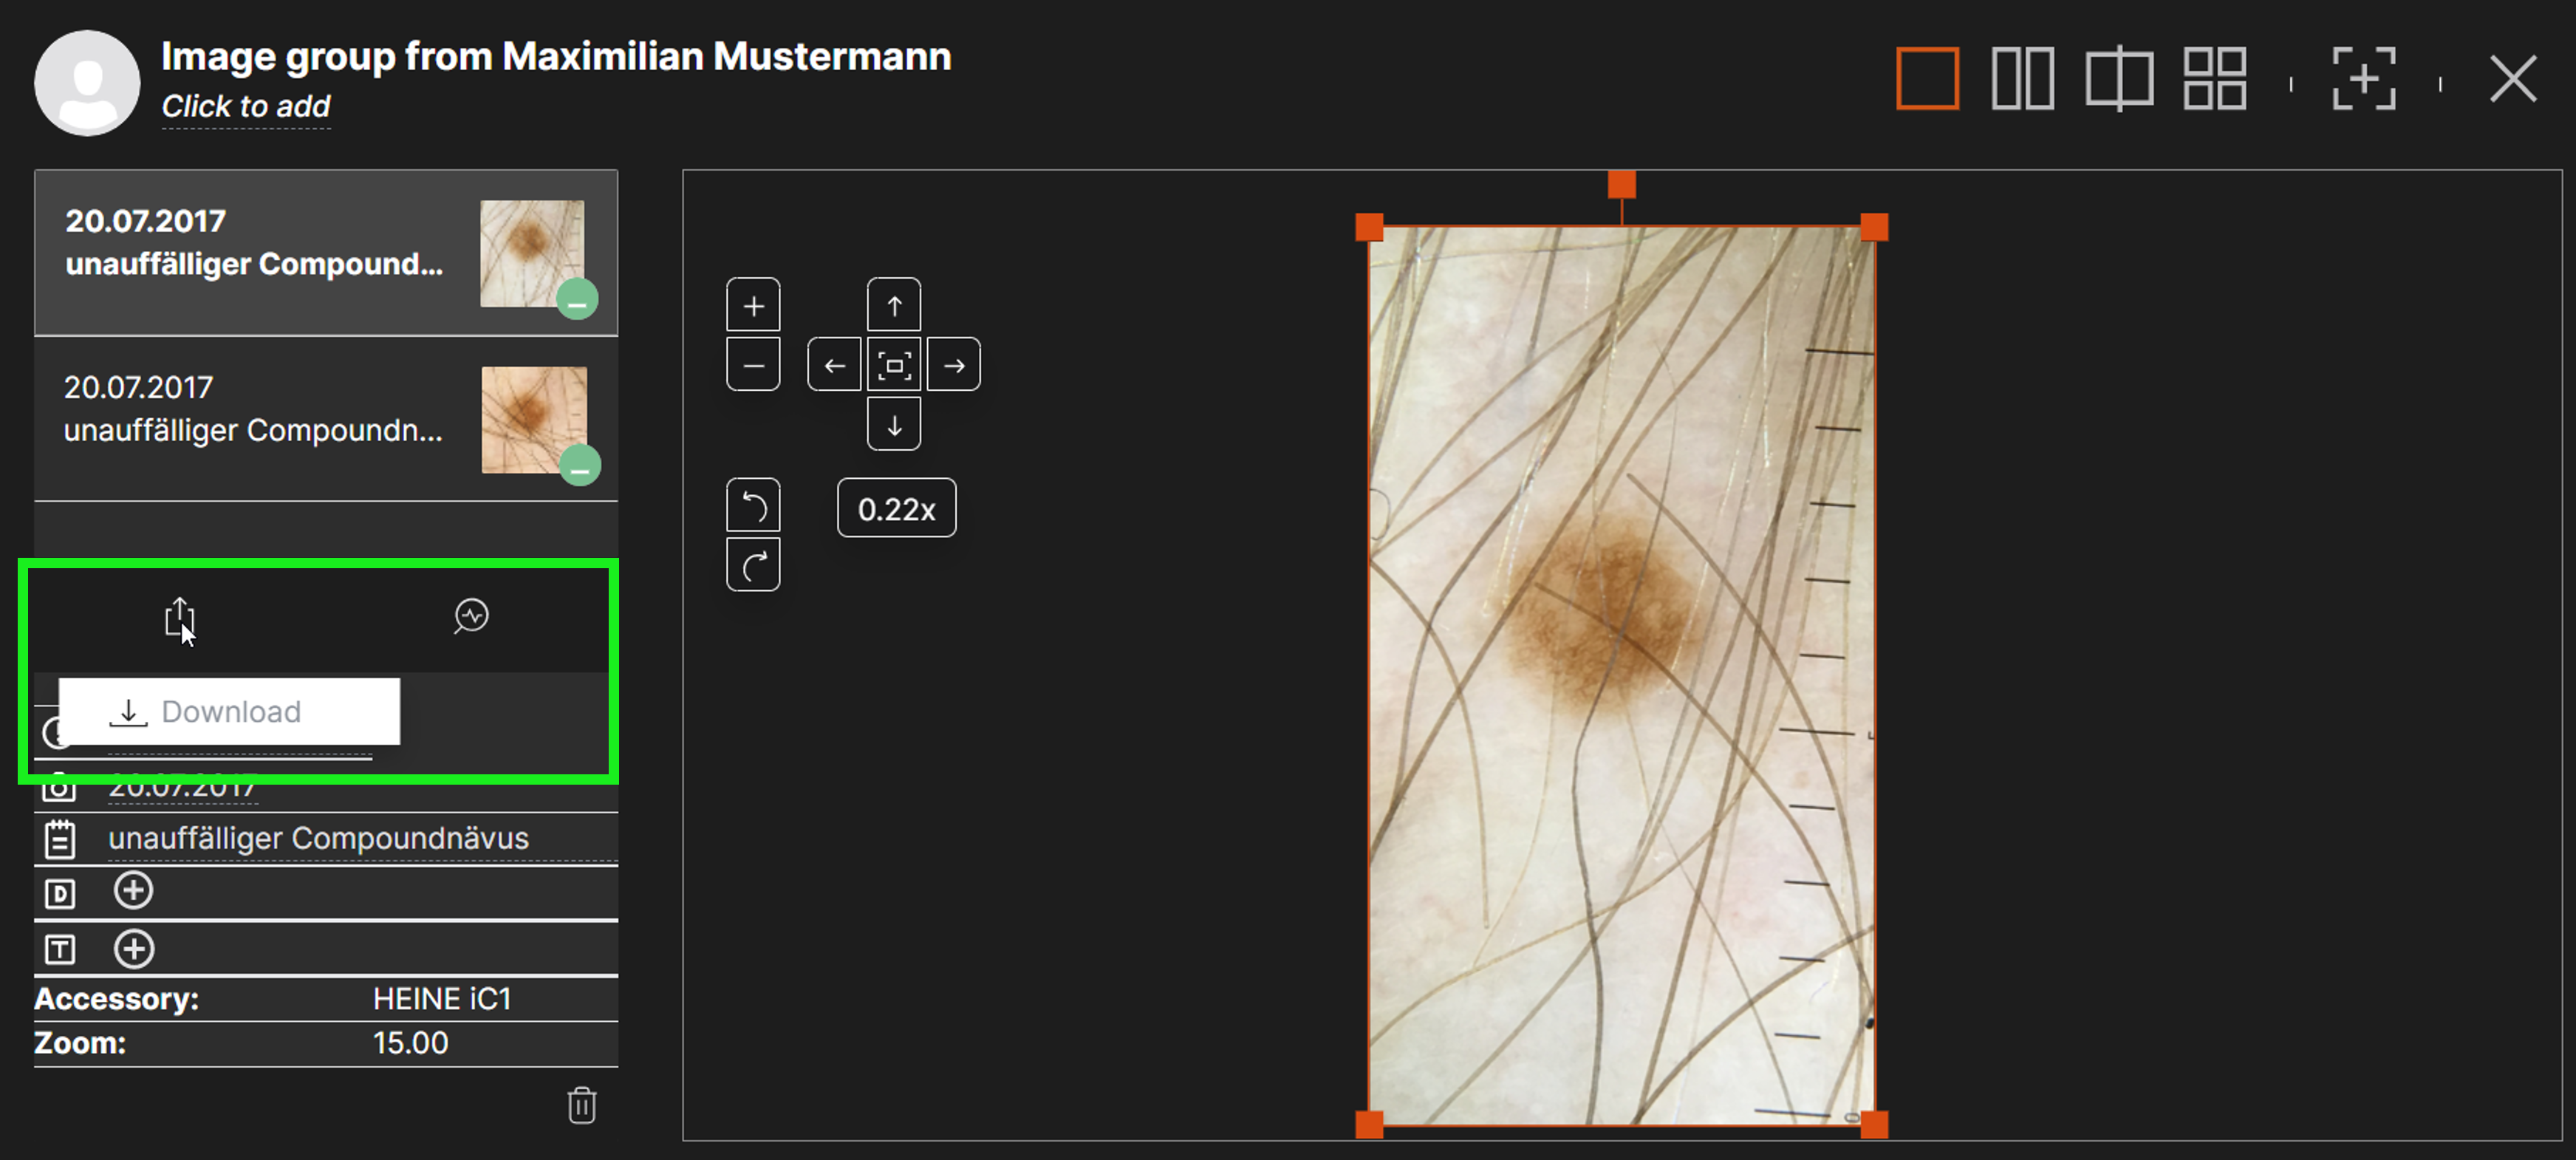
- Select the image you want to export and tap the “Download” button.
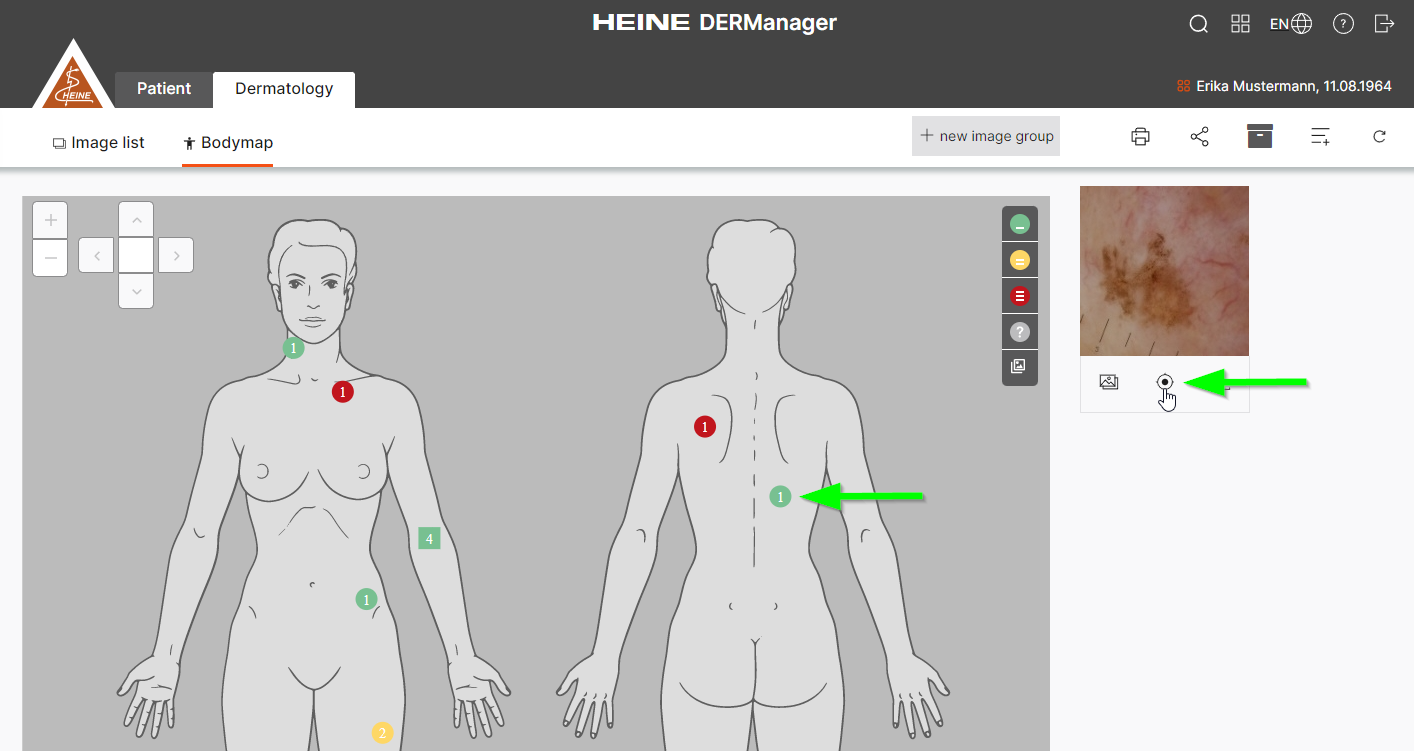
Optional: - Select the patient from the patient overview.
- Select the image you want to export and tap the “Download” button to the right.
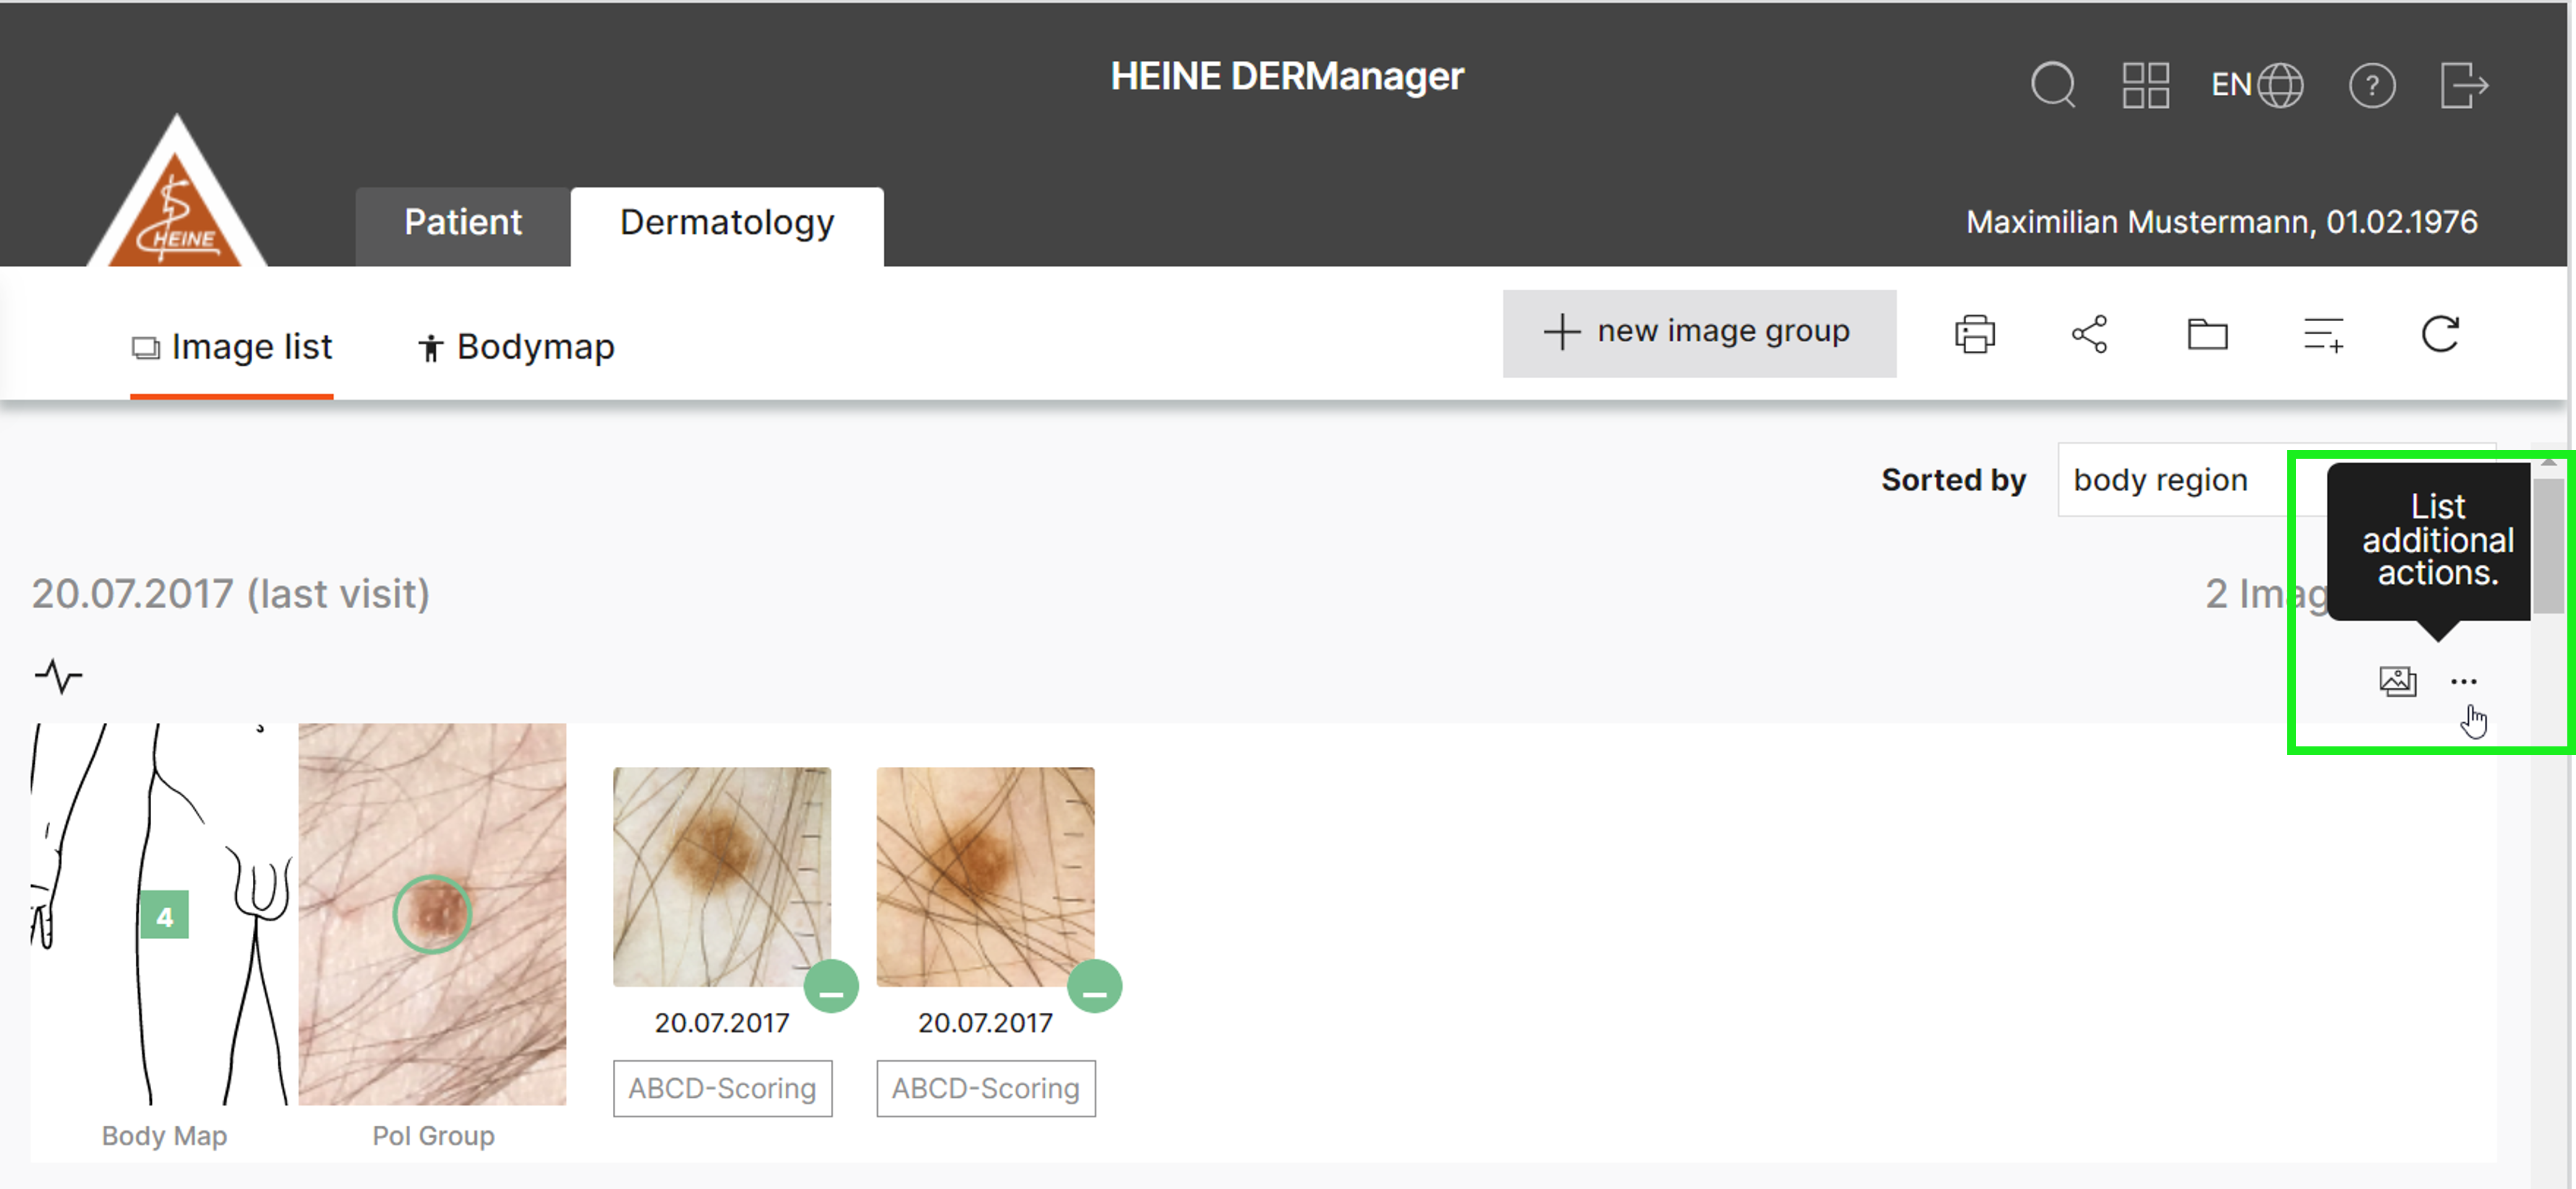
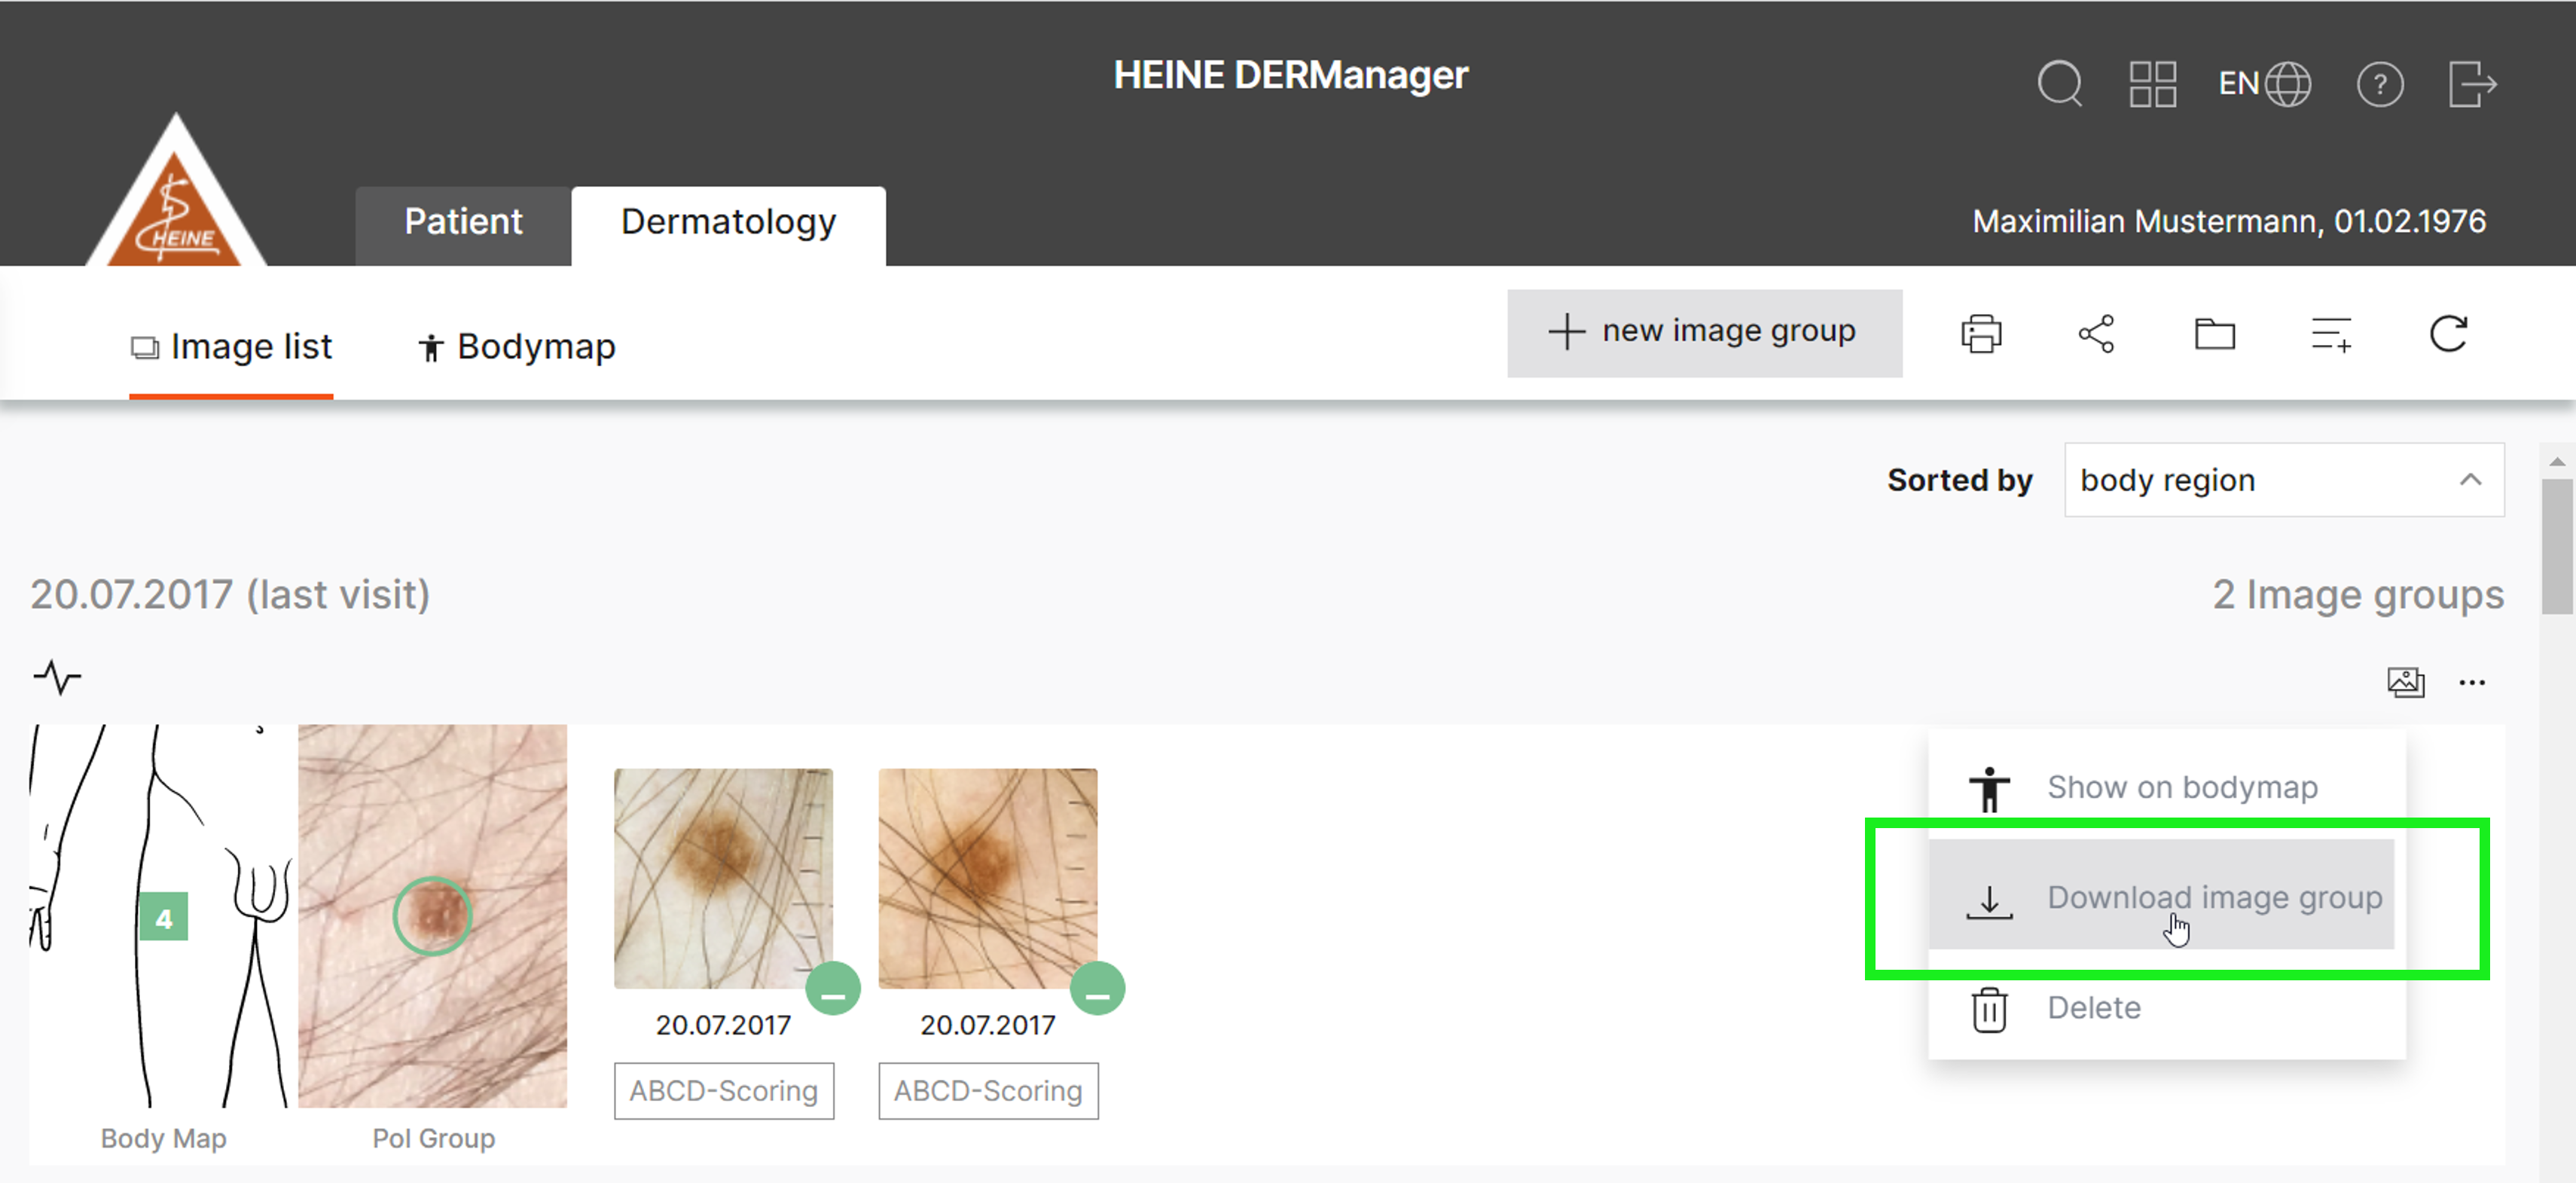
- Export an image group:
- Select the patient from the patient overview.
- Tap the „List additional actions” button within the patient view.
- Tap the „Download image group” button.
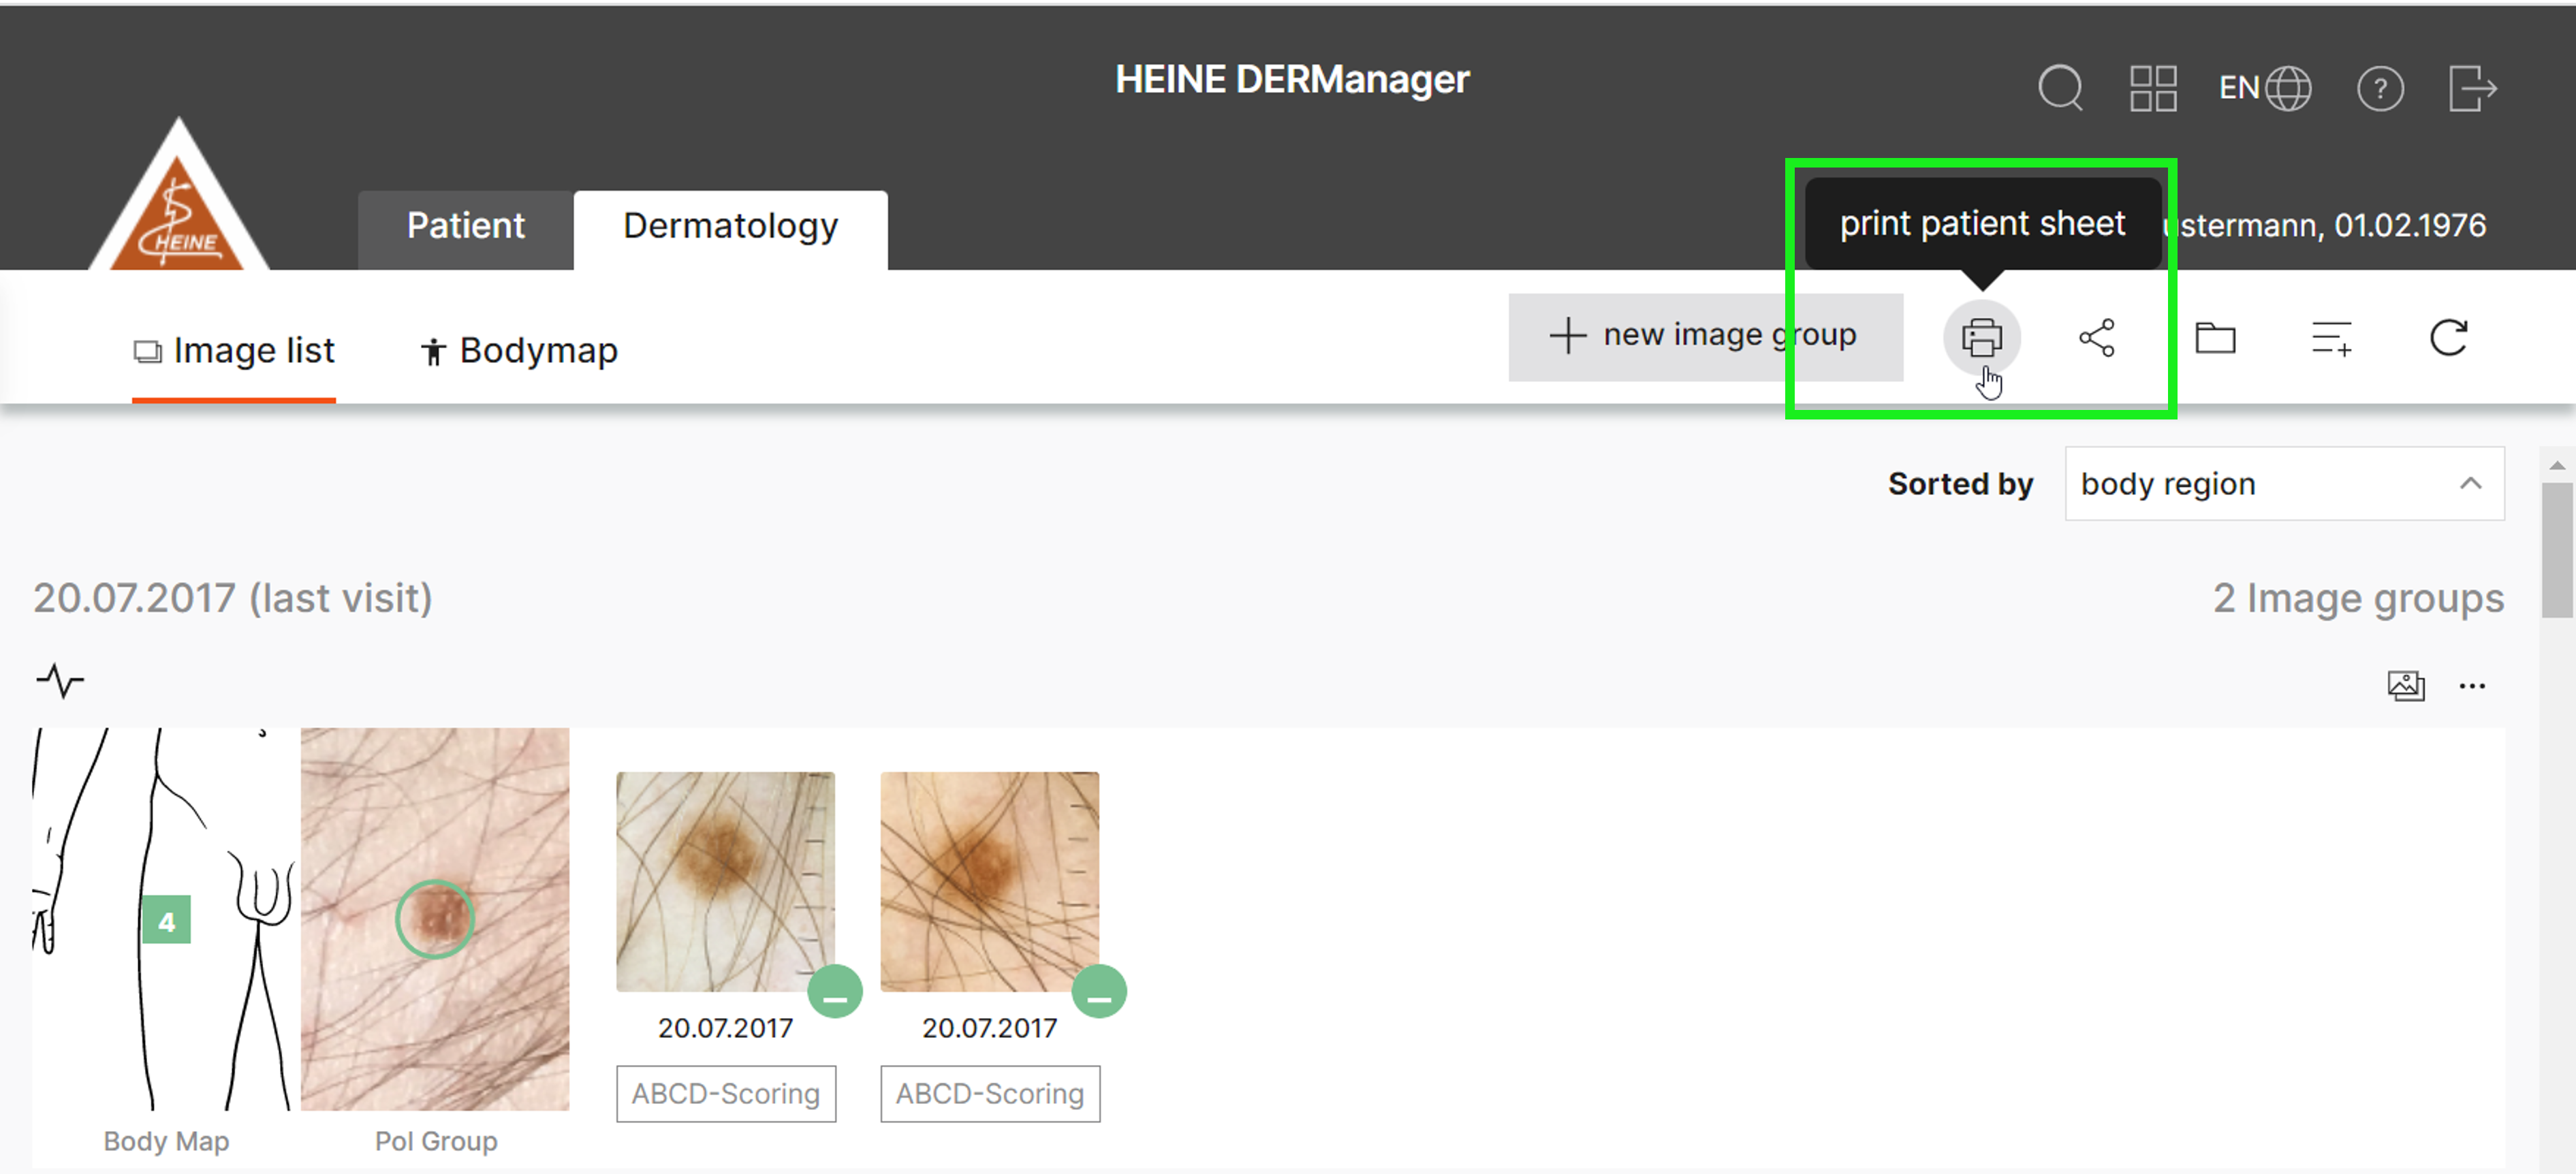
- Export a patient’s file:
- Select the patient from the patient overview.
- Tap the „Print patient sheet” button within the patient view.
- The patient file will be saved as a PDF file on your device.
- Export all your data:
- You have the possibility to request a copy of your data against a fee. Please contact us via our contact form.
Was this article helpful for you?
Patient Management
How can I archive/delete/restore a patient?
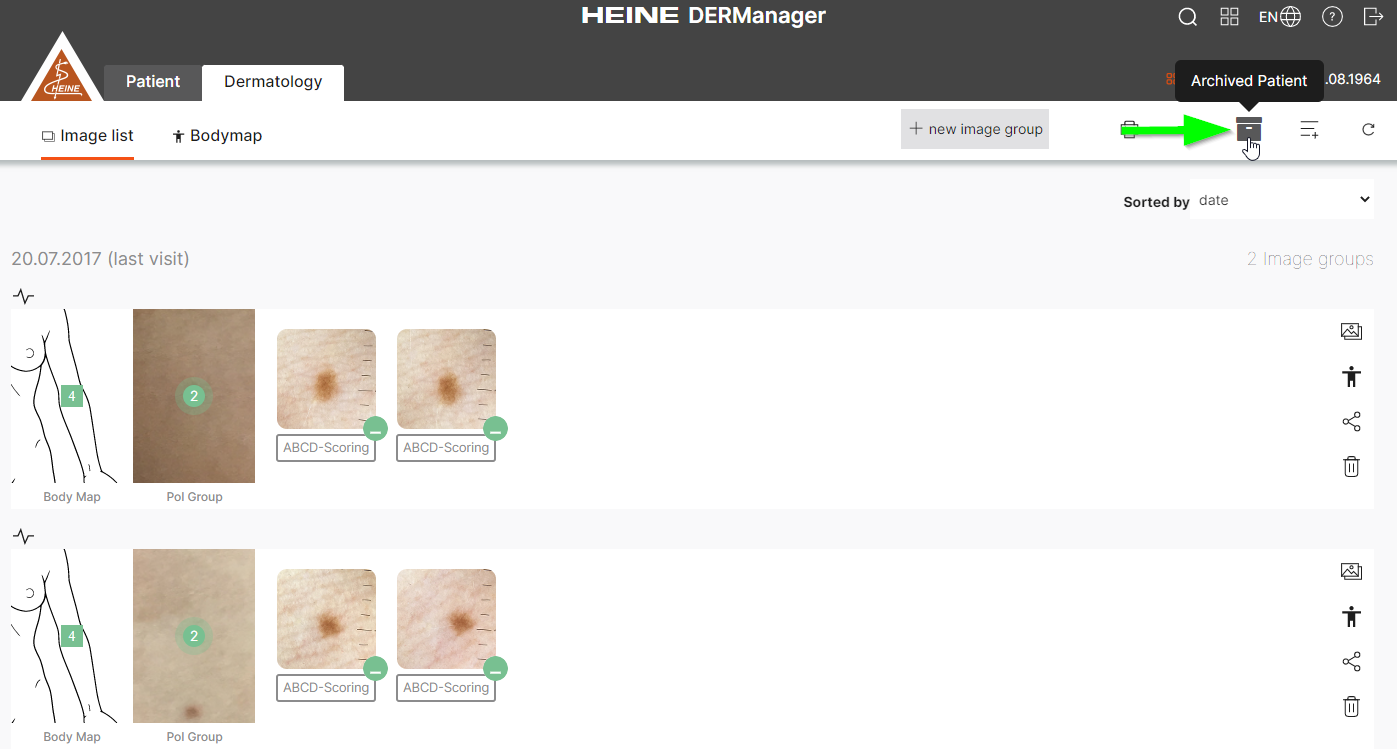
Archive
You can archive a patient by clicking on "Archive Patient" within the patient overview. The patient will be removed from the patient list.
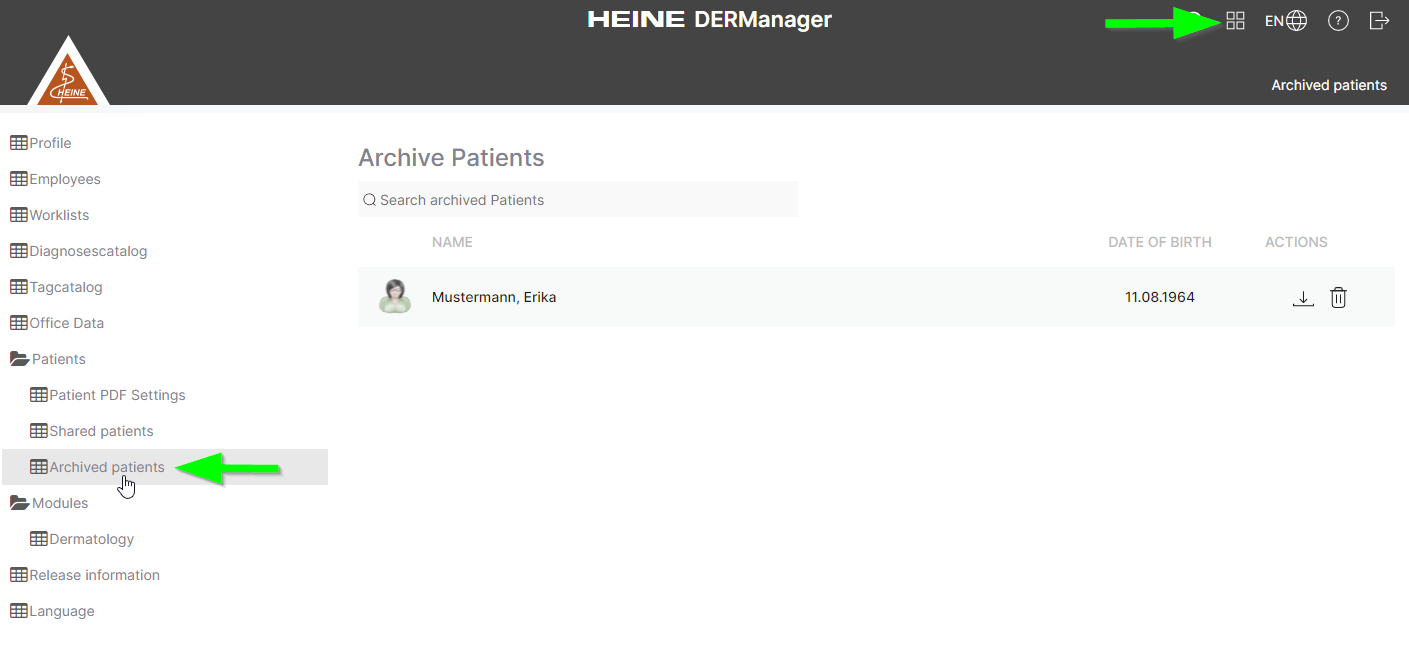
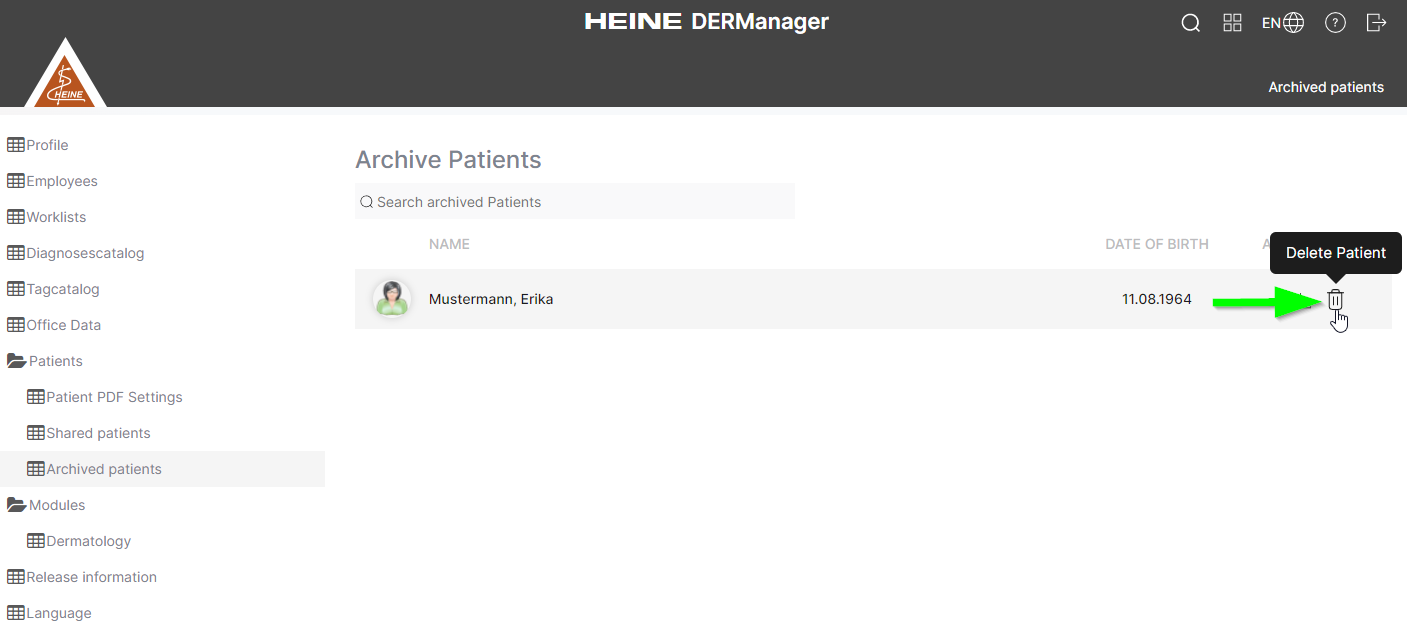
Delete
To delete the patient data permanently, access the archived patients in the settings and click on "Delete Patient".
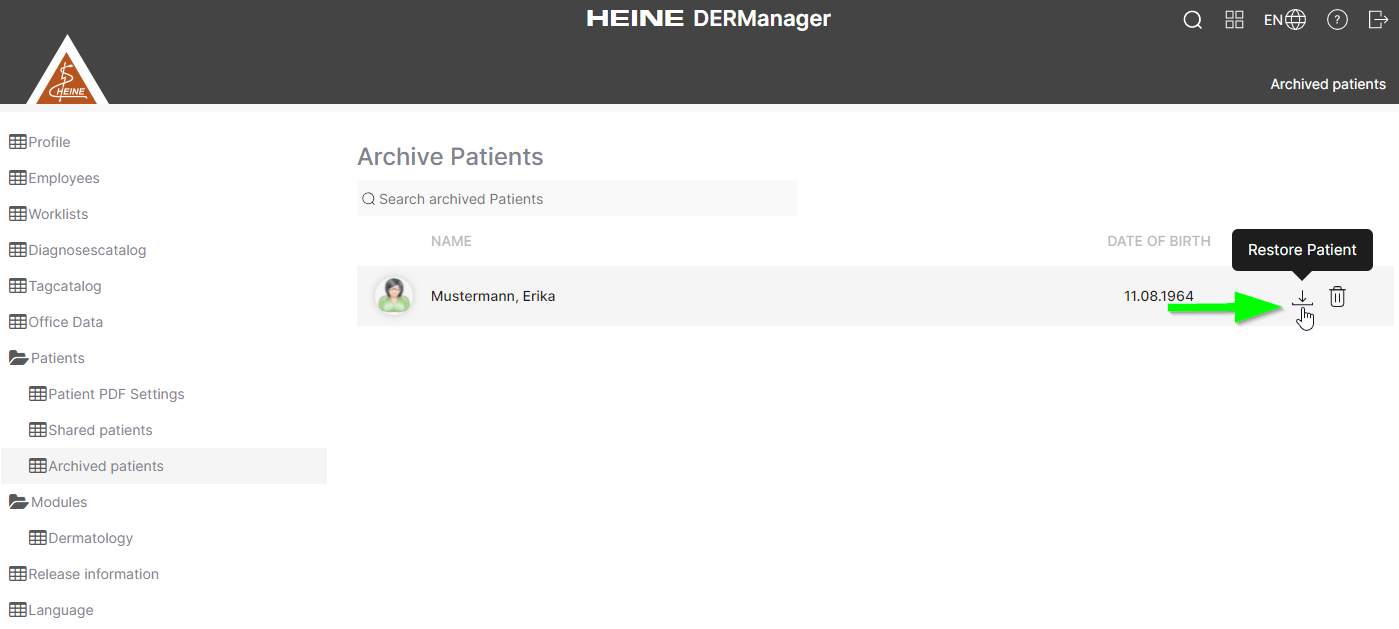
Restore
To restore the patient, access the archived patients in the settings and click on "Restore Patient" next to "Delete Patient".
Was this article helpful for you?
What can I do if I created an image and saved it in the wrong patient file?
Please download the image and upload it manually to the correct patient. You can then delete the image which was saved in the wrong patient file.
Was this article helpful for you?
Is there a possibility for integration into my patient management system?
As a cloud solution, HEINE DERManager does not currently offer a connection to any patient management system. However, it does offer the possibility to open the patient data directly from the patient management system after the patient has been created in DERManager.
All you have to do is to copy the link of the patient from the DERManager and save it in a note field in your patient management system. When you click on the link, all the created patient information opens immediately and simply in DERManager.
In order to fulfill the documentation obligation, the DERManager offers the option to export the patient file as a PDF. Afterwards this can be saved in your patient management system unchangeably. The document contains all the information that you have saved for this patient so far. Find out how this works! Click here and check point number 2.
If the connection to your patient management system is important to you, the Cube powered by DERManager offers the alternative hardware solution.
Contact the HEINE support team for more information.
Was this article helpful for you?
How can I share patient data?
You have 4 options for sharing a patient’s data:
- Sharing the patient profile: Select this option if you’d like to share the patient data using a link. The recipient receives access to the DERManager patient profile using the link, but cannot make any changes.
- Select the patient from the patient overview.
- Tap the sharing icon in the top right-hand corner within the Patient view.
- Now tap the ‘Create public link’ button.
- You can choose between further actions using the dropdown menu:
- Select ‘Copy to clipboard’ to share the link. Now you can insert and send the link as you wish.
- Tap the calendar icon on the right to adjust the link’s expiry date. The link will expire at midnight on the expiry date.
- Tap ‘Stop sharing’ if you’d like to stop sharing the patient profile with immediate effect.
- Sharing the patient file: Select this option if you’d like to share all the patient data, including the series of images, as a PDF file. The associated positioning on the Bodymap, the risk classification and the notes you make are shared too.
- Select the patient from the patient overview.
- Tap the ‘Print patient sheet’ button within the Patient view.
- The patient file is saved as a PDF file on your device.
- Share the PDF file over a secure, encrypted communication channel.
- Sharing a series of images: Select this option if you’d like to share all the images in a series of images and the associated risk classifications / notes.
- Select the patient from the patient overview.
- Tap the ‘Export / download’ button within the series of images you’d like to share.
- The series of images is saved as a ZIP archive on your device. It contains the individual images in the series of images and a text file with the corresponding image and patient data.
- Share the ZIP archive over a secure, encrypted communication channel.
- Sharing an individual image: Select this option if you’d only like to share one image as an image file. The associated risk classification / description is not shared.
- Select the patient from the patient overview.
- Tap the individual image you’d like to share.
- Tap the ‘Download’ button.
- Save the image to your device.
- Share the image over a secure, encrypted communication channel.
- Alternatively, you can also share each image in the image comparison modes. Tap the ‘Export’ button, followed by ‘Download’.
Was this article helpful for you?
Settings
How do I add a user?
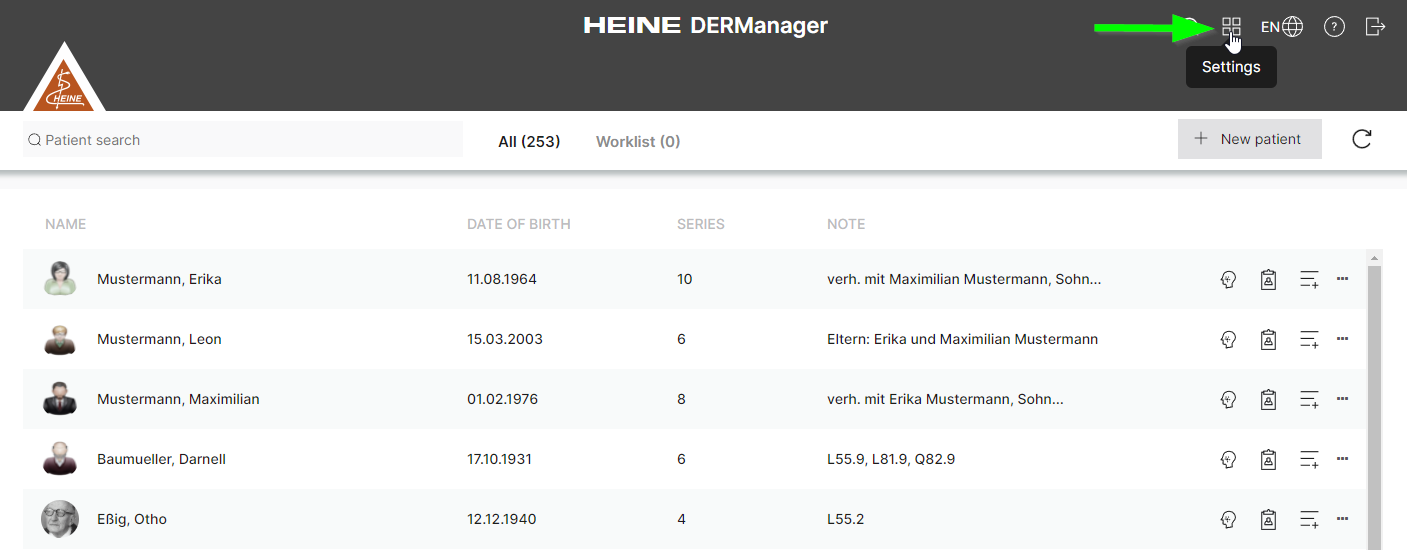
- Log in with a user who has the administrator role in the DERManager web.
- Enter the settings menu in the top right navigation menu.
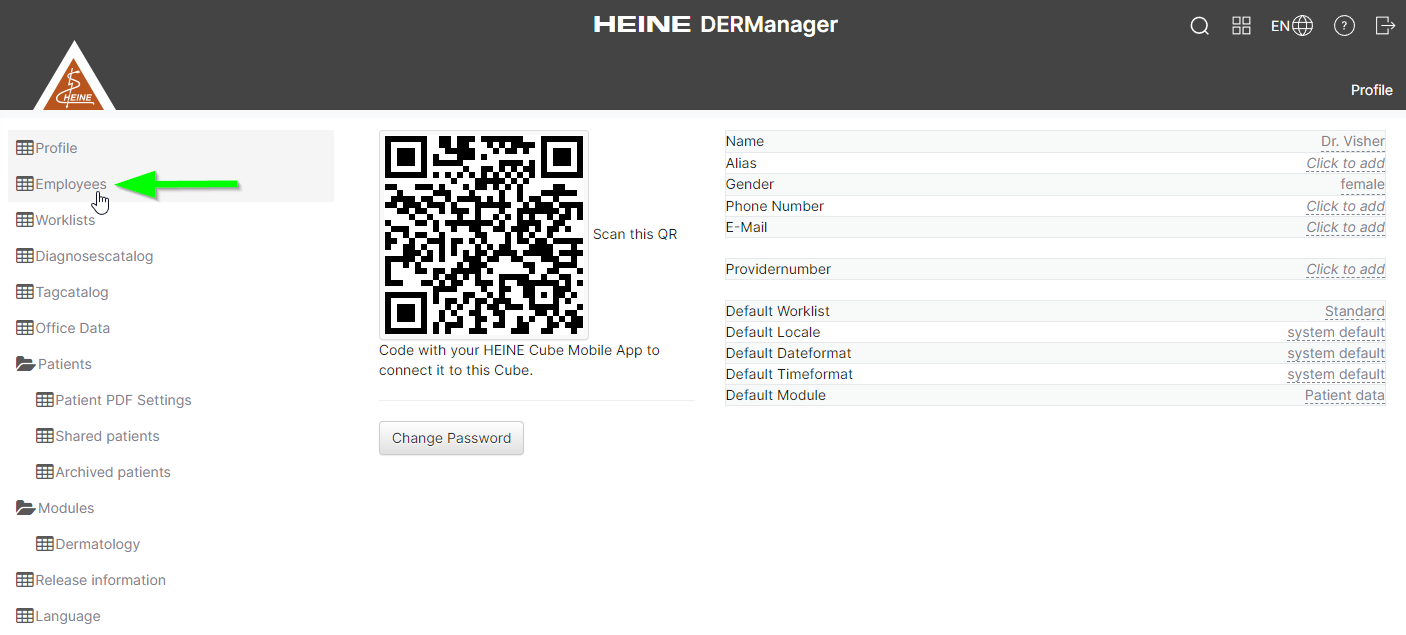
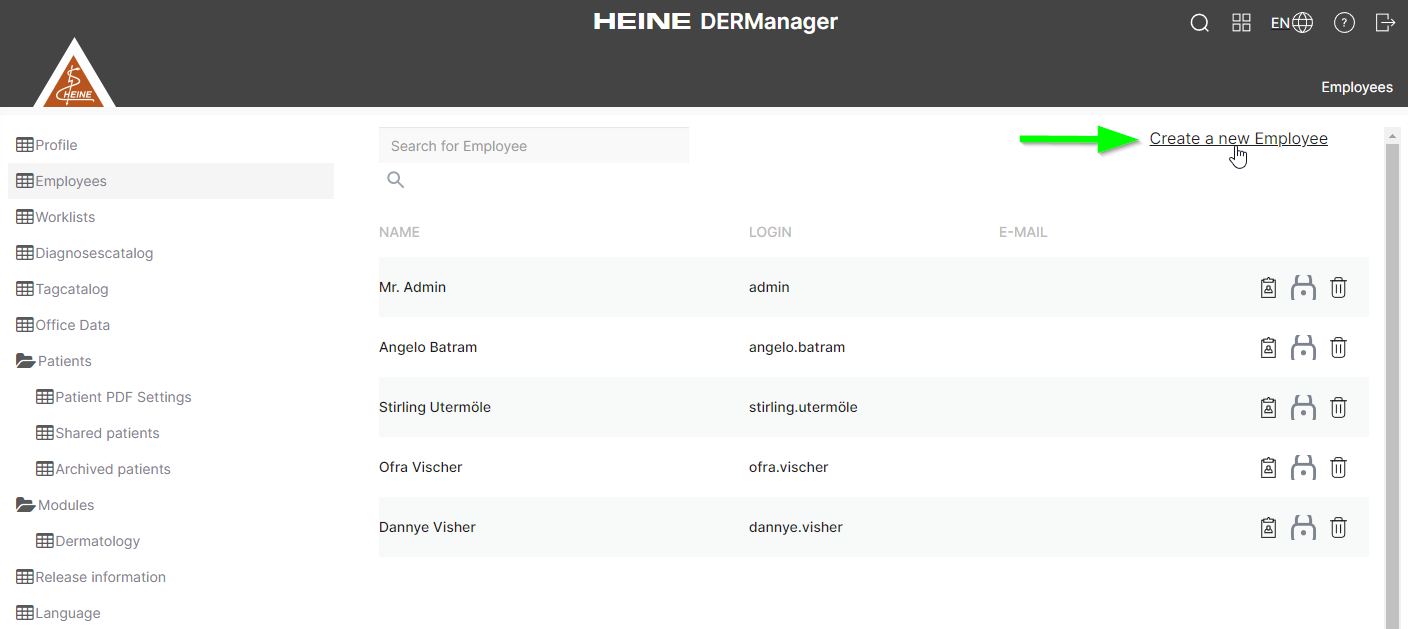
- Choose “Employees” in the left navigation menu and click on “Create a new Employee” in the top right corner.
- Fill in the required information, select a Doctor/Admin user role if required and create a new user.
- Share the login information with the new users.
- DERManager link
- Username
- Password
Was this article helpful for you?
What is the difference between Standard User, Doctor and Administrator?
The main difference is defined by access rights to the settings for the DERManager web.
Standard User Account
A standard user can only change a limited number of settings in the system but can use its full functionality.
Doctor Account
The doctor account would be recommended as the default account to work from. They have access to the full system functionality and can execute more changes in the settings of the DERManager web, e.g.: changes in the office data, add tags, change the layout of the patient-pdf, and add/edit the diagnosis catalogue.
Administrative Account
- The administrator has full access rights to the system e.g.: add new users, reset passwords, or change access rights.
- As administrator, please make sure to save your username and password securely.
Should the administrator be also working with the DERManager daily, we do recommend creating a separate doctor account.
Was this article helpful for you?
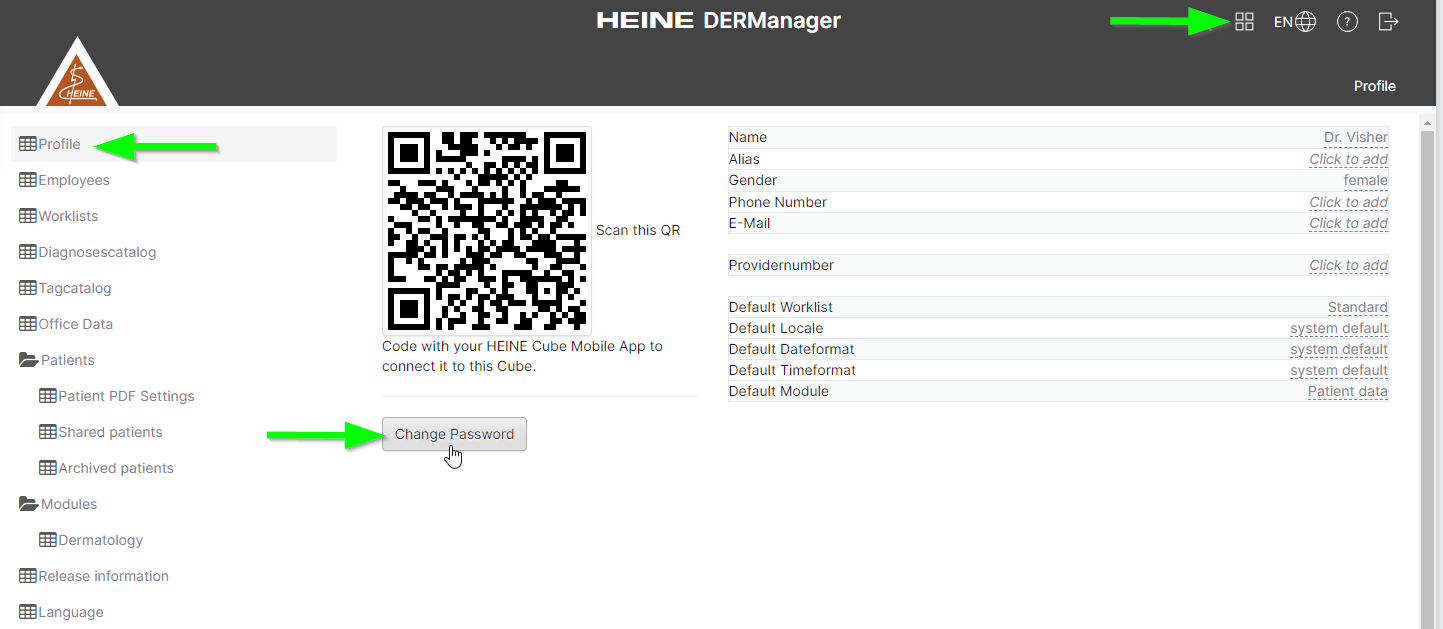
How do I change my DERManager password?
The password can be changed in the settings.
Was this article helpful for you?
I have forgotten my access credentials for the DERManager account. How can I get them back?
Standard user / doctor
If you are using a standard user account or a doctor account, contact your local DERManager administrator.
They will be able to view your username and/or change your password.
Administrator
If you are a user with administrator privileges and have forgotten your access credentials, please contact the HEINE Support Team using our contact form.
If you have set up a standard user / doctor account in addition to the administrator account, you can continue to work with this while your request is being processed.
Was this article helpful for you?
Troubleshooting
I cannot connect to my DERManager web?
Check if you have entered the correct login data (username + password).
- You received these in the registration email. If they have been changed, please contact your DERManager administrator.
Check if you have an active internet connection.
- Open any internet page in a browser (e.g.: Safari, Google Chrome, Microsoft Edge).
Was this article helpful for you?


