HEINE Cube: Step-by-Step
Wireless data transfer to the practice server
The HEINE Cube System is particularly suitable for dermatologic and general practices that focus on skin cancer screening.
The Cube System can be used for full-body documentation and following up with patients who have lots of naevi on their bodies.
Structured follow-ups and initial analysis tools form part of the Cube System that can be integrated into the practice network.
Every workstation and every smartphone is granted access following registration.
One key difference from working with the HEINE DERM app:
The CUBE system doesn’t store the data on the smartphone. Instead, it stores the data on its own server.

Workflow with the HEINE Cube
Special group of patients with a high number of naevi
The Cube System can be used to document naevi that are benign at the time of examination, but appear heterogenous compared to other naevi on the body, even over a perioud of years.
The practitioner can work wirelessly and doesn’t have to use larger hand-held devices as with the Fotofinder.
1. Documentation with the HEINE CUBE
- A new patient can be accessed or created using the HEINE Cube app on the smartphone, using the connected PC, or directly using the practice management system’s GDT interface (a standardised interface between medical practice IT systems and medical devices) - if available.
- First of all, an overview image of the relevant region on the patient, where the naevi to be documented are located, needs to be captured. This step can be skipped as needed, but it is particularly useful when there are a large number of naevi to be documented.
-
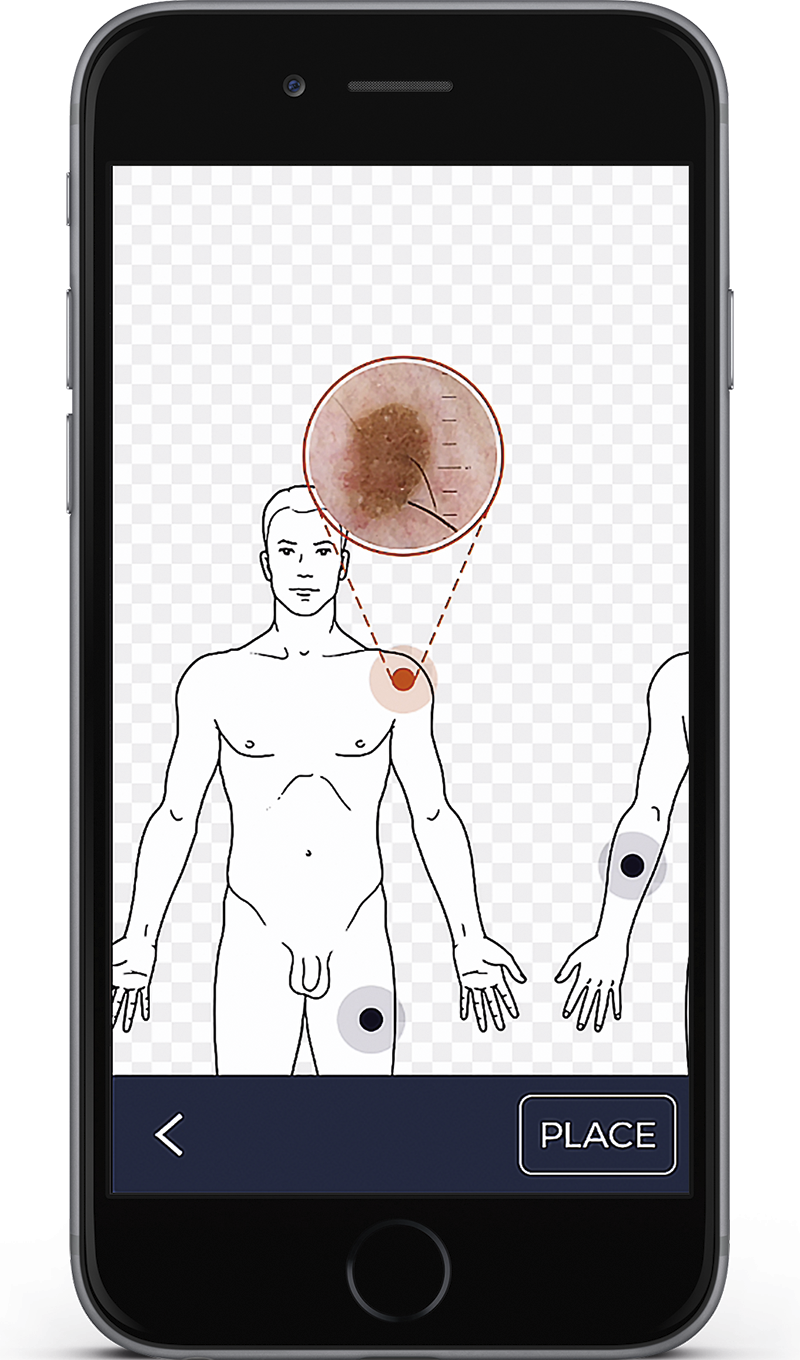
Place the image on the bodymap.
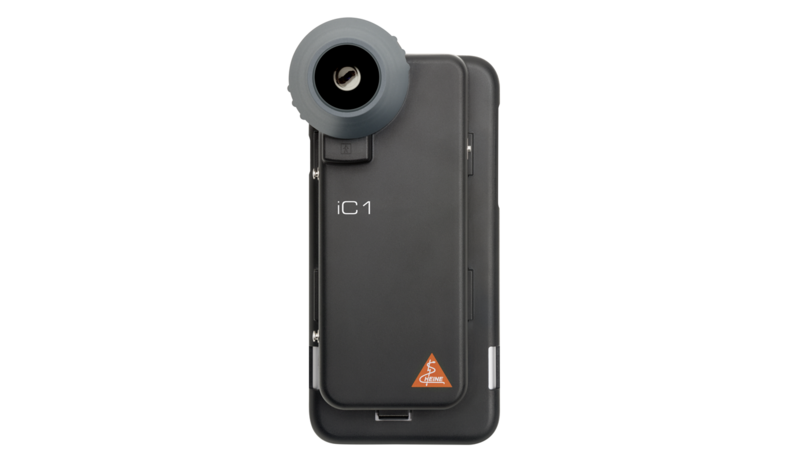
- Capturing the dermatoscopic image: The dermatoscope is magnetically connected to the relevant mobile phone case and placed on the lesion. The dermatoscope connected to the smartphone can be selected in the top part of the screen. Zoom in and out as appropriate and position the lesion in the best possible way by pinching and spreading with two fingers.
Practical tip: you achieve the best image result with up to 2x digital zoom.
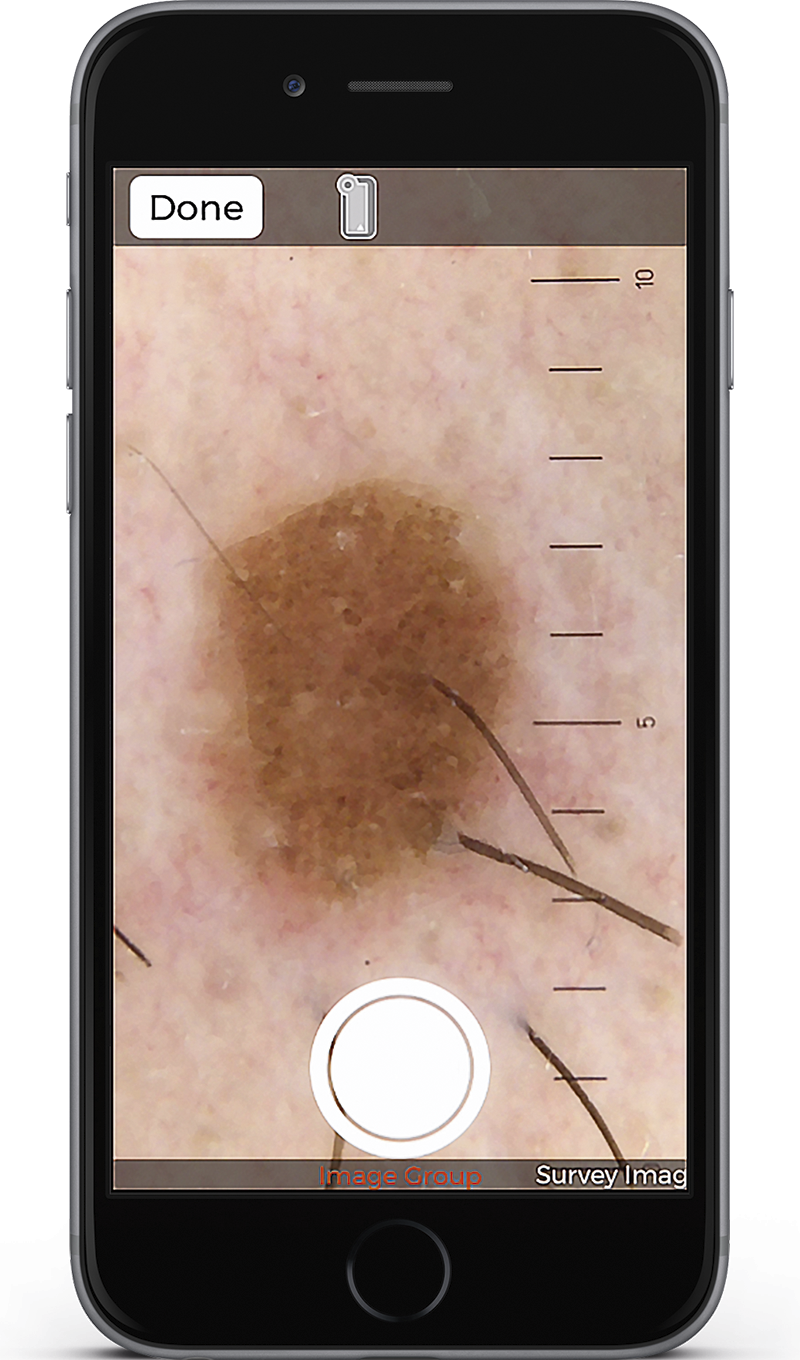
- Once the image has been captured, the naevus can be classified directly using the colours green (benign), yellow (short-term monitoring in 3 months) and red (excision) shown along the bottom edge of the image.
- The image is saved and assigned on the overview image (not pictogram!). This ensures the naevus’ exact and precise location, eliminating the possibility of confusion, especially when there is a high number of naevi on the patient’s body.
- Additional dermatoscopic images can be added to the same overview image / region.
- The images are then stored directly on the Cube System, which can also be accessed from the computer.
Additional functions:
- Download images to the patient file
- Add a description, diagnosis or keyword
- Document a series of lesions
2. Examination
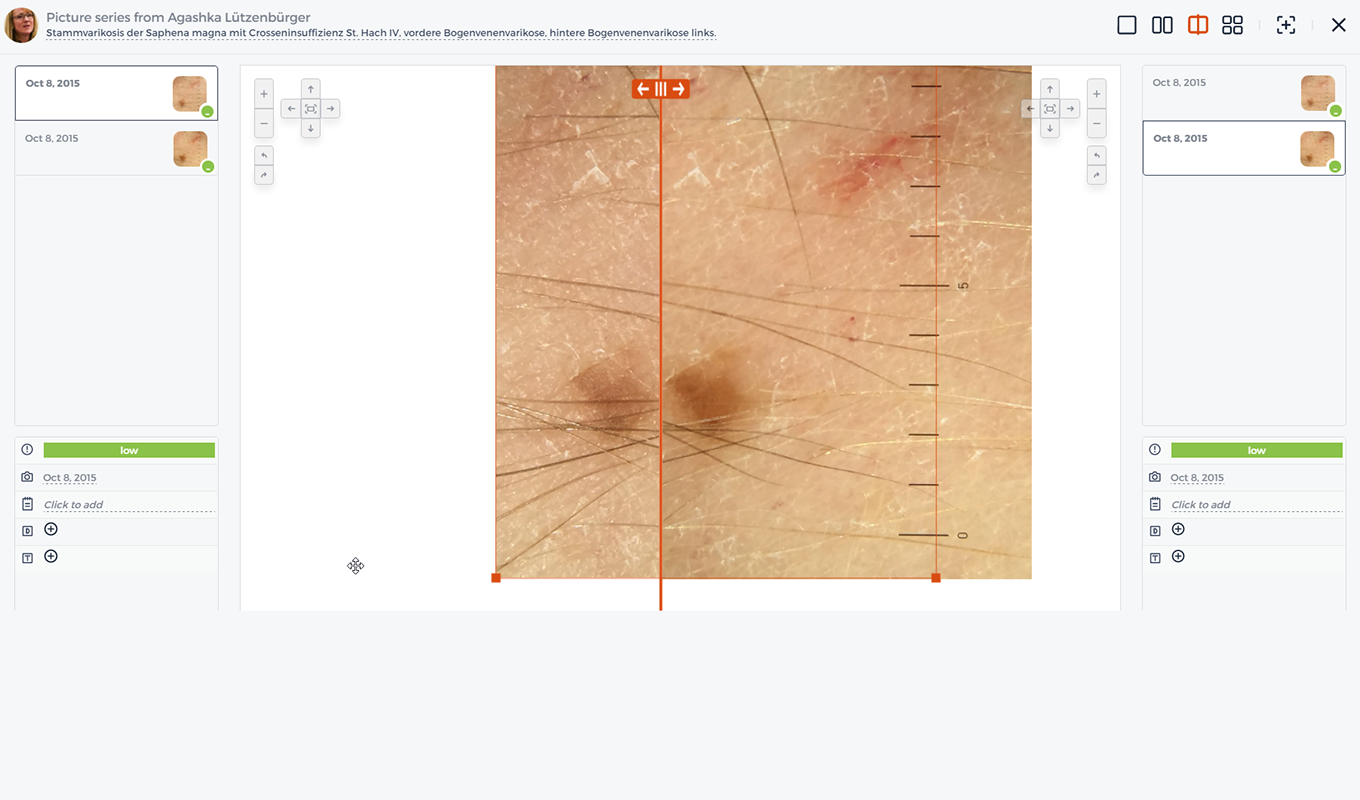
A lesion can be assessed using the Cube System and the Cube app after a set period of time: An ‘up-to-date’ image is added to the previous images for this purpose. The different images can be viewed side-by-side in different modes on the computer:
1. Individual / side-by-side / tiles or up to 4 images

2. Viewing the images using the slider
Here, images can be tagged with keywords or given a colour-based assessment: green (benign), yellow, or red (malignant / requiring excision). However, after a follow-up examination after a set period of time, it is advisable to reassess the categories.
By Max Tischler, Specialist in Dermatology
More Information

Digital monitoring: Easy. Efficient. Safe.
The digital dermatoscope