Drawing the retina for procedures
Tips for preparing retinal drawings
Particularly at the beginning of residency, many young practitioners find preparing retinal drawings difficult. But precise completion can be invaluable to the retinal surgeon. Indirect ophthalmoscopy allows even young and inexperienced colleagues to quickly gain an overview of the retina’s pathology due to the large, visible cross-section of the retina.
Wearing a head-worn ophthalmoscope while drawing the retina means the young practitioner has their hands free to hold the loupe and can draw detailed findings. Additionally, in situations where imaging the fundus was unsuccessful, accurate drawings are irreplaceable when it comes to documenting a finding that needs to be checked. The only way of ensuring comparability during the check is with a detailed drawing.
Following the retinal exam with the ophthalmoscope, beginners are often confronted with the problem of realistically adding the findings to the drawing in the correct places. Why?
Because what the untrained examiner is seeing is a horizontal and vertical inversion of the retinal cross-section through or projected in front of the loupe plane. Up is down, and right is switched with left. This confuses many beginners when they have to realistically document a finding on a drawing ‘the other way around’.
Tips for preparing retinal drawings
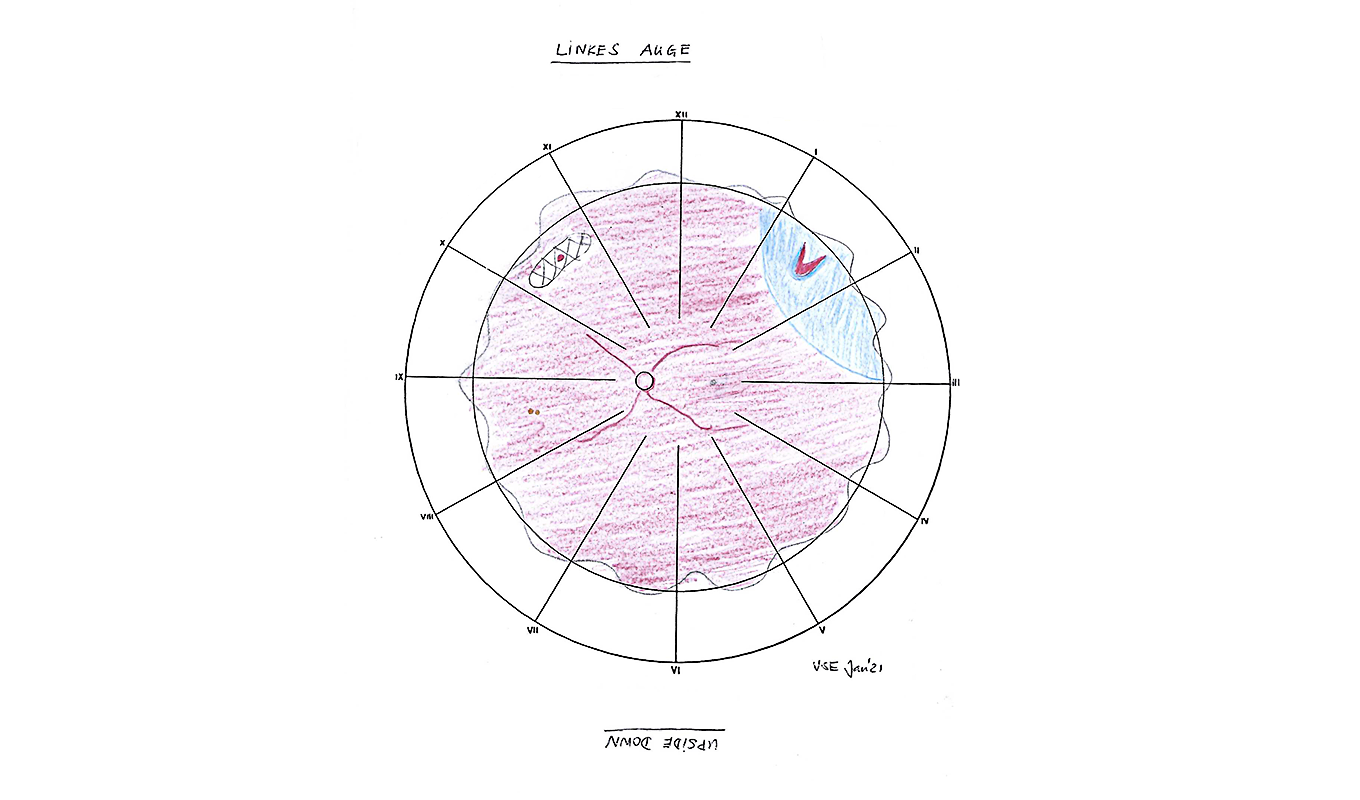
*Image of a left eye
Drawing of the retina in the left eye: Horseshoe shapes at 1:30 with accompanying ablatio retinae from 1 to 3 o’clock and degeneration area at 10:30 with a small round hole
- First, trace the optic nerve on the retinal drawing. Draw it on the right for the right eye, and on the left for the left eye. Next, draw the macula temporal to it. That’s half the battle.
- If they’re documenting central findings, such as arterial occlusion or haemorrhage in the case of retinal vein thrombosis, beginners should remember to simply turn the drawing template upside down, then they’ll be viewing and copying the fundus in the exact same way. Without changing their minds. Turn the sheet back to the original position after documenting the findings. Voilà! The drawing’s done. Correctly, too.
- Things get slightly more complicated when recording peripheral findings like holes with or without ablatio retinae, tumors, haemorrhages or Berlin’s oedema in a contusio retinae, for example.
- It’s clear that, if the patient looks up, the superior part of the retina is visible. Temporal eye movements allow an examiner to see the temporal part, and the same is true of nasal and inferior movements respectively.
- But the section you see there is inverted yet again, i.e. you see it ‘upside down’.
Another tip for beginners:
- Note the time you record the findings. That stays the same on the drawing. A retinal hole at 9 o’clock is marked on the drawing at 9 o’clock too. To document the finding in detail at this time, simply flip the sheet over again and draw it at the marked time without changing your mind. If you then turn the sheet back to the original position, you’ll have correctly drawn in the finding at 9 o’clock.
- Many practitioners don’t need this ‘flip trick’ later on, once they’ve gained some experience. Others stick by this method. Everyone will find what works best for them. What is really important is that both the findings and the locations are correct.
By Dr. Vera Schmit-Eilenberger, ophthalmology specialist
More Information
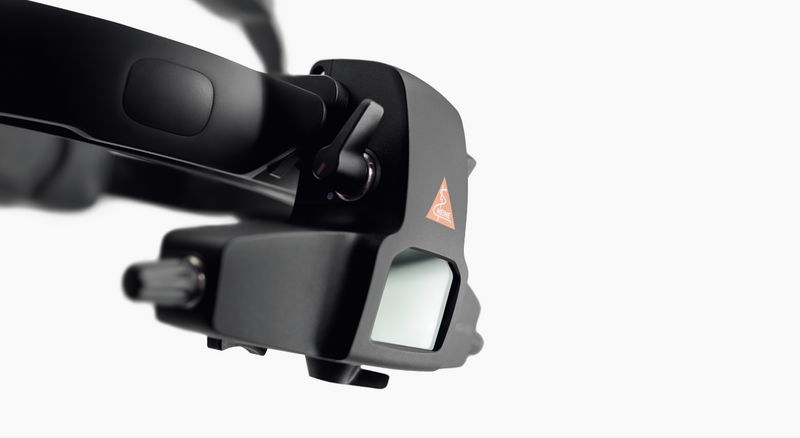
The new high-end indirect ophthalmoscope
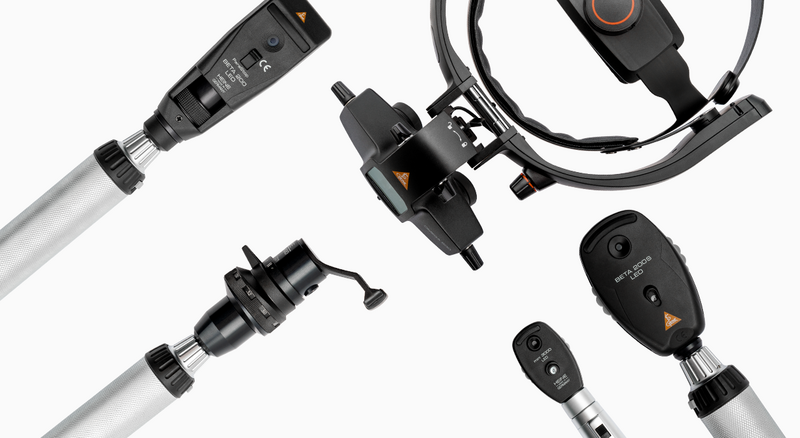
Binocular Indirect Ophthalmoscopes, Direct Ophthalmoscopes, Retinoscopes

Brückner Test with the direct ophthalmoscope